Sync
A Sync Group is a logical grouping of the Employee Groups and Device Groups. Based on the Sync Group, real-time changes on the Employee profile are automatically synced with the associated Devices. It consists of two tabs - Sync Group and Sync Pending.
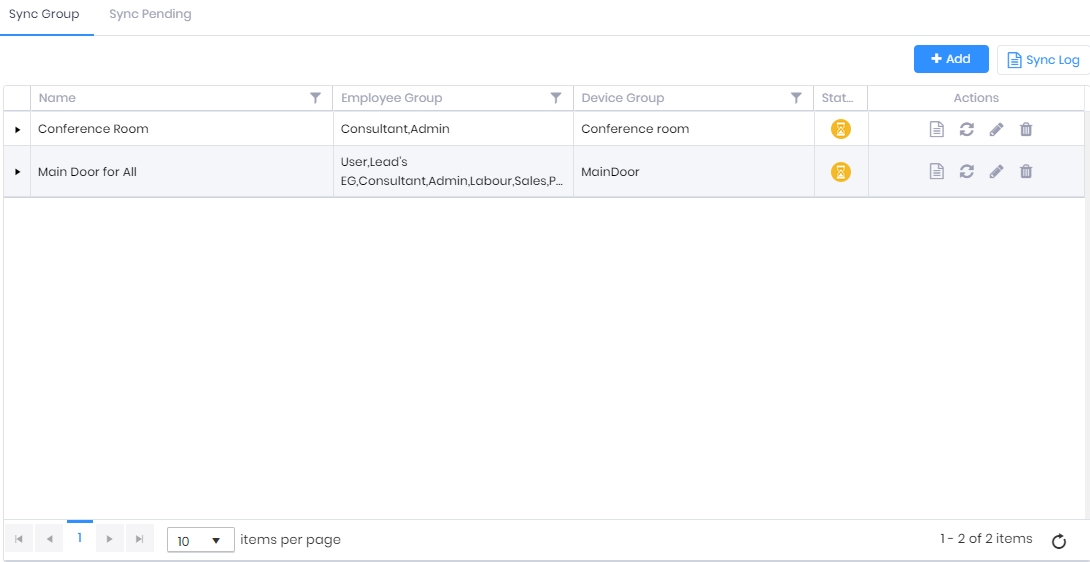
Screen Layout of Sync Group
Field Description of Sync Group
A list of already existing Sync Groups will be displayed. In case not a single Sync Group has been created yet, this list will be blank.
The Status column in the list displays the current status of the Sync Group. The yellow icon indicates the Sync is in progress. The green check mark indicates the Sync is complete. The red icon indicates the Sync has failed.
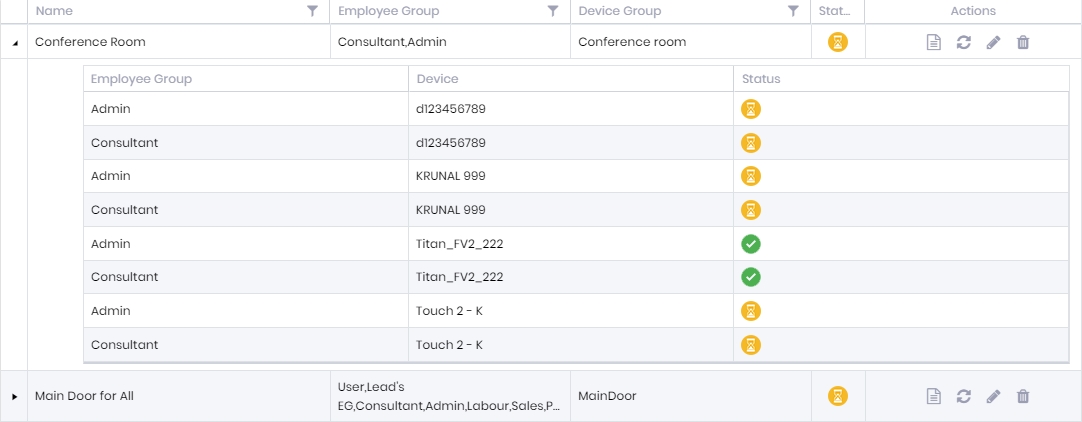
Click on the small arrow in the first column of the list to expand and view the Sync Group as follows -
To add a new Sync Group, click on  button on the top right corner of the screen.
To edit a Sync Group, click on  icon in the Actions column of the list to edit respective Sync Group.
Following options will be displayed -
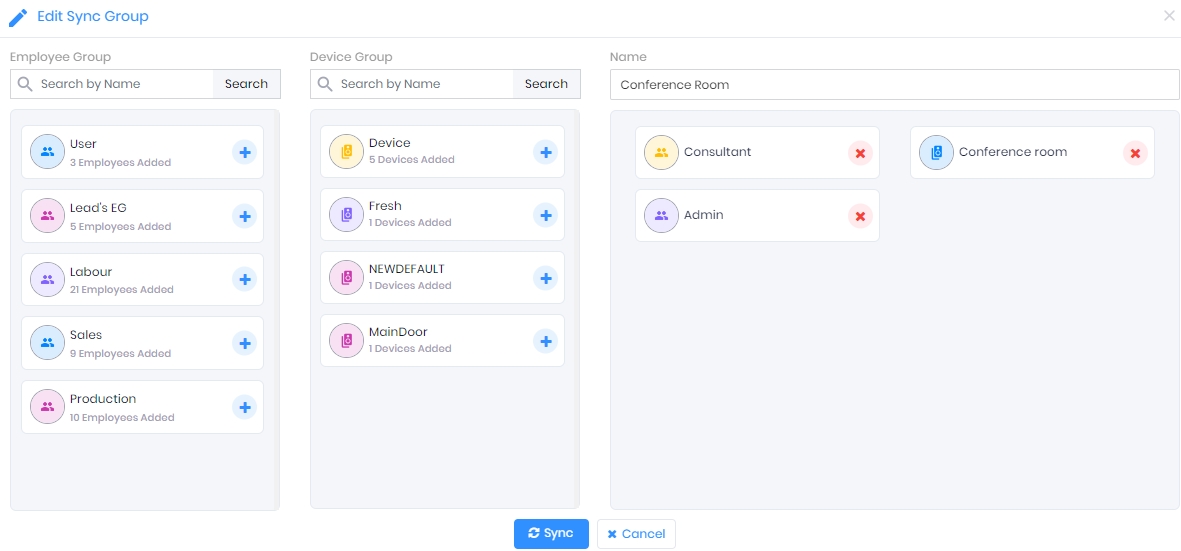
Employee Group:
A list of existing Employee Groups will be displayed under this section.
Click on the + icon given against each Employee Group to include it. The selected Employee Group will be moved under the Name section.
Device Group:
A list of existing Device Groups will be displayed under this section.
Click on the + icon given against each Device Group to include it. The selected Device Group will be moved under the Name section.
Name:
Denotes the name of the Sync Group. A list of selected Employee Groups and Device Groups will be displayed under this section.
While adding a new Sync Group, enter the name.
While editing a Sync Group, its name will be displayed. You can change it.
A list of selected Employee Groups and Device Groups will be displayed under this section. You can remove any of the Groups from this list by clicking on the x icon on that Group.
Once done, click on Sync button to map the selected Employee Group(s) with selected Device Group(s). Click on Cancel button to discard the action.
In case of continuation, "Sync Group in progress message" will be shown -
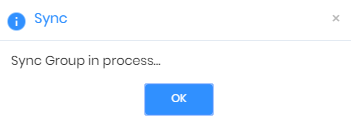
Click on OK button to continue. The Sync Group will be displayed in the list.
Click on  icon in the Actions column of the list to delete respective Sync Group. The application will ask for confirmation as follows -
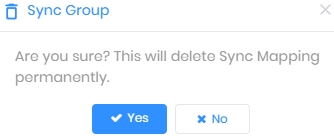
Click on Yes button to delete the Sync Group. It will be removed from the list. Click on No button to discard the action.
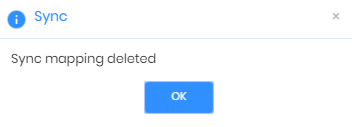
After the process is complete, a confirmation message will be displayed -
Click on  button on the top right corner of the screen to view Sync status of all the Sync Groups.
Click on  icon in the Actions column of the list to Sync respective Sync Group.
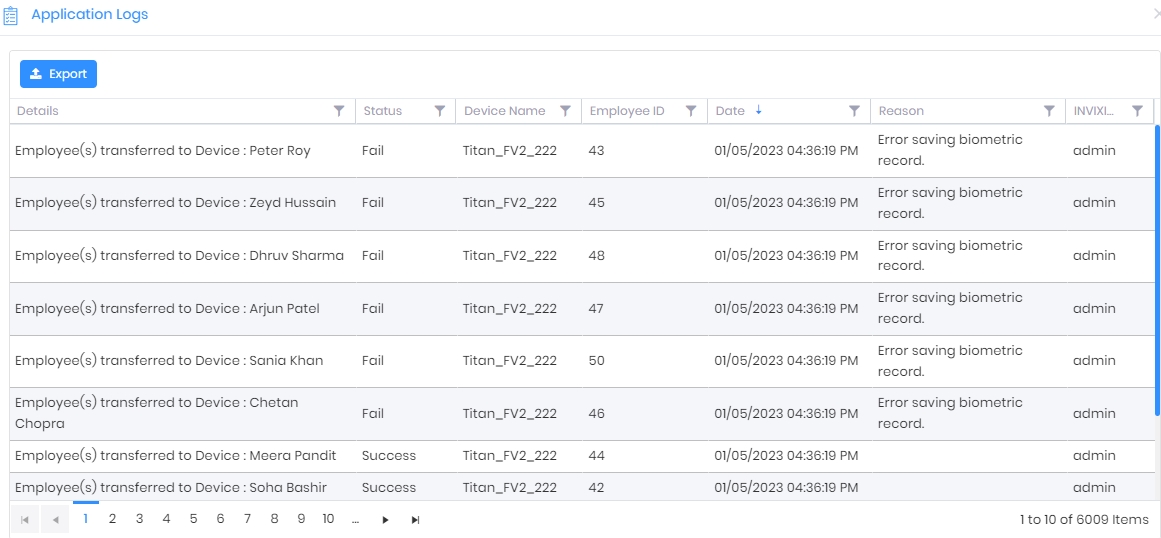
The “Application Logs” window will show a success or failure message as follows -
Click on  icon in the Actions column of the list to Sync individual Sync Group.
Screen Layout of Sync Pending

Field Description of Sync Pending
This tab displays a list of pending Sync status for your information.