You are here: Convert > Face
|
|
Convert Face
IXM Face Convert is a licensed module that converts non-proprietary face images into standardized Invixium biometric templates.
|
NOTE This Module is visible only if IXM Face Convert license is purchased. You can request License from License >> Convert option.
|
-
IXM Face Convert provides multiple options for bulk data conversion for the following sources:
-
SQL Server database
-
Oracle database
-
-
User can convert the following templates or image types to Invixium standard templates:
-
BMP
-
JPEG/JP2
-
PNG
-
-
The minimum resolution of the image file should be 250x250.
-
The minimum size of the image file should be 10 KB and maximum should be 5 MB.
-
Templates or images should fulfill certain quality criteria. Refer our guidelines for details...
Pre-requisites
The firmware for IXM TITAN and IXM TFACE devices should be updated to the latest version. Using older firmware versions may lead to incorrect face template creation and potential denial of face authentication.
It consists of the following tabs:
Screen Layout of Configure
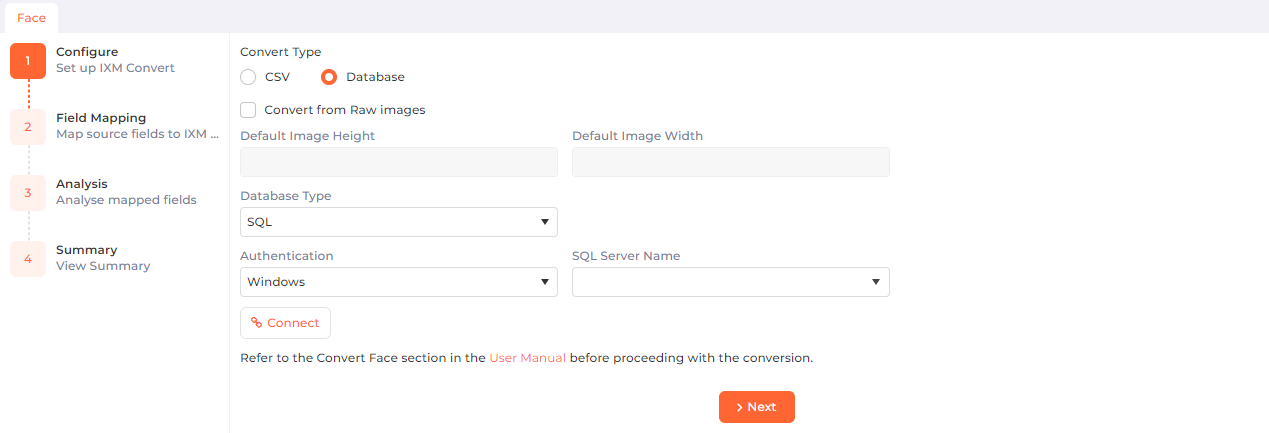
Field Description of Configure
Convert Type:
CSV
Select this option if you want to convert using a CSV file. Following options will be displayed -
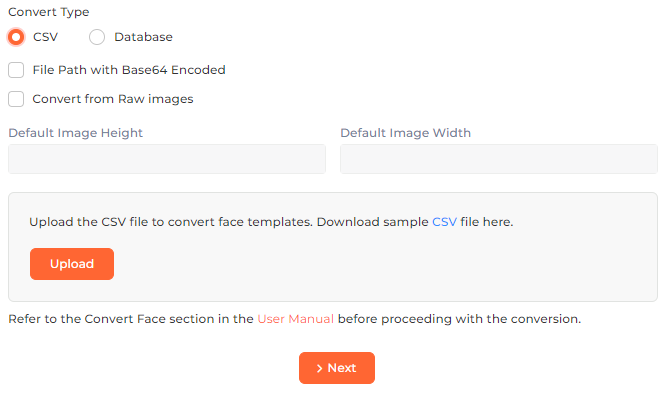
File Path with Base64 Encoded
Click on the checkbox if you want to convert the images by providing the Base64 string as a file path.
Convert from Raw images?
Click on the checkbox if the images to be converted are in raw format. The following options will be displayed:
Default Image Height:
Enter the default height of the images.
Default Image Width:
Enter the default width of the images.
Click on CSV to download the sample CSV file.
Add data into the CSV file and upload the file to IXM WEB by clicking on Upload button.
Click on Next button to go to the Field Mapping tab to map the source fields against IXM WEB fields.
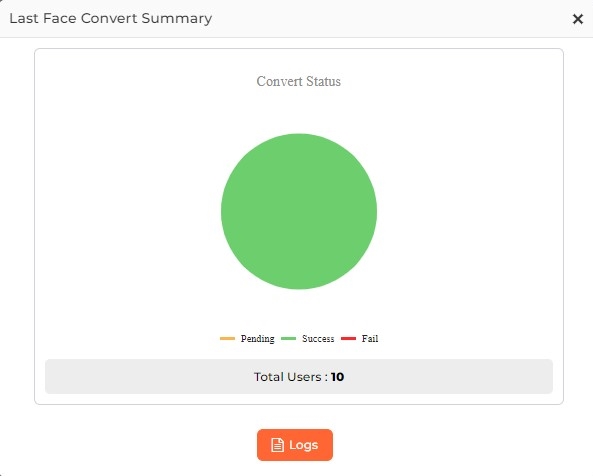
Click on View Summary button to view the summarized status of last convert as follows:
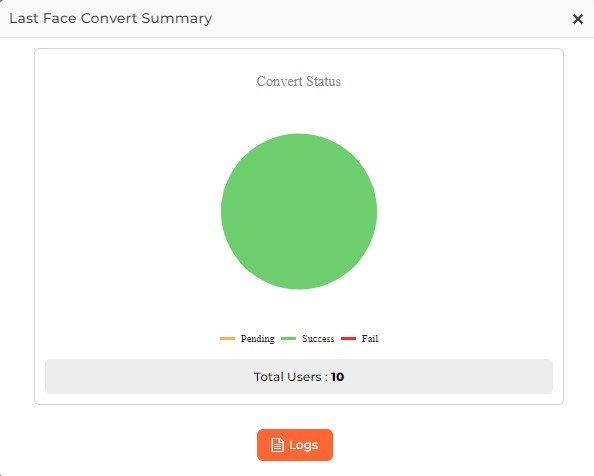
Clicking on Logs button will display the application logs for the same.

Database
Select this option if you want to convert from a Database. Following options will be displayed -
Convert from Raw images?
Click on the checkbox if the images to be converted are in raw format. The following options will be displayed:
Default Image Height:
Enter the default height of the images.
Default Image Width:
Enter the default width of the images.
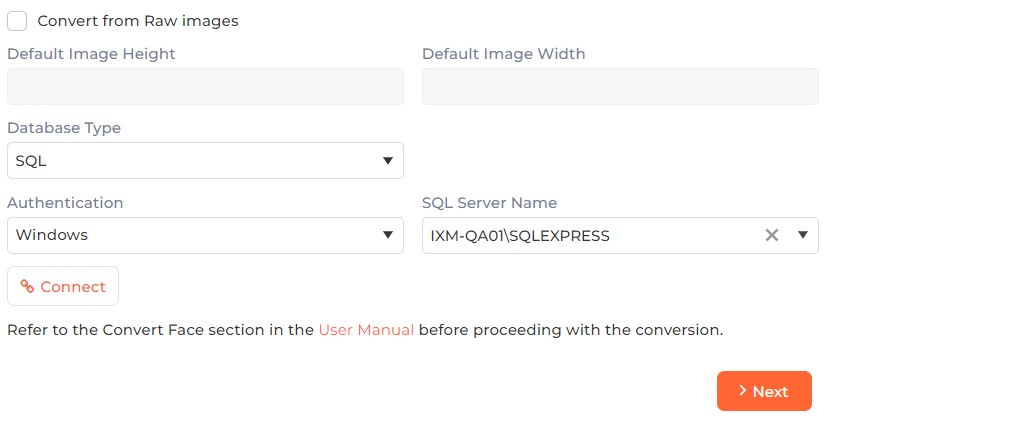
Database Type:
Select the type of Database from the dropdown list.
In case SQL is selected, following options will be displayed -
Authentication:
Specify the authentication mode for login type by selecting either "Windows" or "SQL Server" from the dropdown list.
SQL Server Name:
Select the Name or IP of SQL Server instance where the said database is installed from the dropdown list.
Click on Connect button to connect to the Database. Following options will be displayed -
Database Name:
Select the name of the Database from the dropdown list.
Select Table:
Select the name of the Table(s) which contain user details & biometric data from the dropdown list. A maximum of 5 tables can be selected.
Select Primary Table:
Primary Table Name is required if more than 1 table is selected. All the selected tables must have a relationship between them.
Apply Filter
Select this option if biometric templates of selected existing users need to be converted. This will show you a list of users available in the primary table. Select the required user(s) and click on OK button.
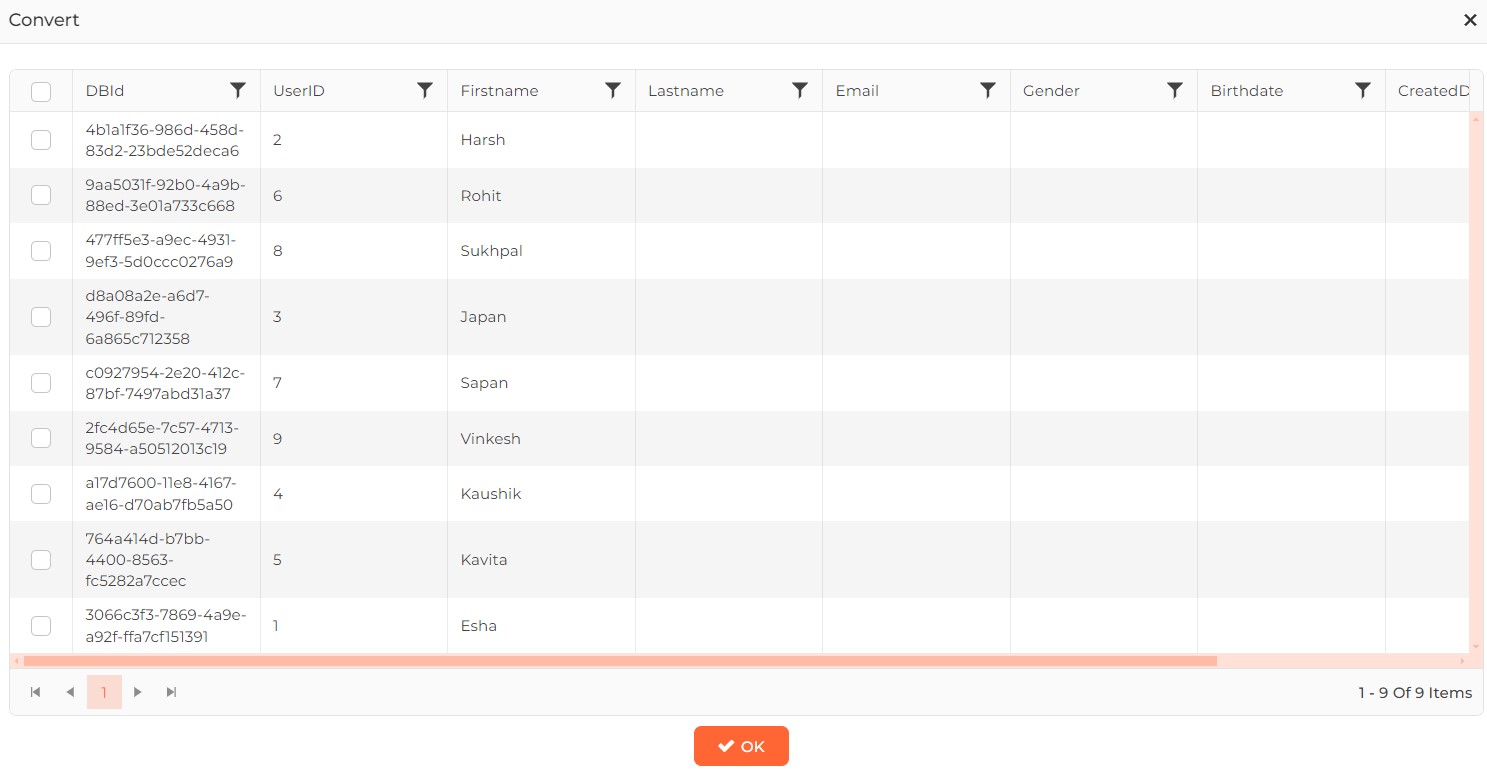
The “Apply filter” field will display the total count of filtered records next to the checkbox in the Database Connection screen.
Click on Next button to go to the Field Mapping tab to map the source fields against IXM WEB fields.
In case ORACLE is selected, following options will be displayed -
Server IP Address:
Enter IP address of the machine where Oracle is installed.
Server Port:
Enter Port number of the Oracle database.
Database Name:
Enter Database name which contains user details & biometric data.
Username:
Enter Username to log into Oracle Client/Server to access Database.
Password:
Enter Password to log into Oracle Client/Server to access Database.
Click on Connect button to connect to the Database. Following options will be displayed -
Database Name:
Select the name of the Database from the dropdown list.
Select Table:
Select the name of the Table(s) which contain user details & biometric data from the dropdown list. A maximum of 5 tables can be selected.
Select Primary Table:
Primary Table Name is required if more than 1 table is selected. All the selected tables must have a relationship between them.
Apply Filter
Select this option if biometric templates of selected existing users need to be converted. This will show you a list of users available in the primary table. Select the required user(s) and click on OK button.
The “Apply filter” field will display the total count of filtered records next to the checkbox in the Database Connection screen.
Click on Next button to go to the Field Mapping tab to map the source fields against IXM WEB fields.
Click on View Summary button to view the summarized status of last convert as follows:
Clicking on Logs button will display the application logs for the same.
Screen Layout of Field Mapping
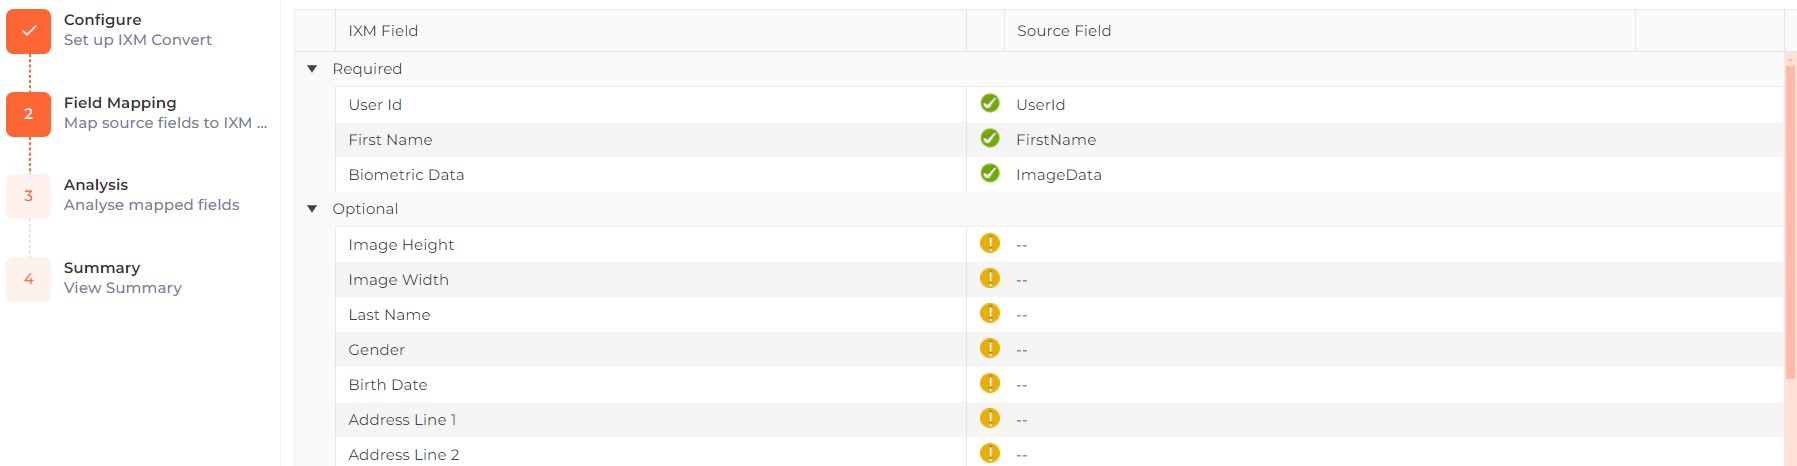
As you can see, 2 columns are displayed - IXM Fields and Source Fields. You will have to map source fields against IXM fields.
Field Description of Field Mapping
"User ID", "First Name", and "Biometric Data" fields under the “Required” section are mandatory for mapping.
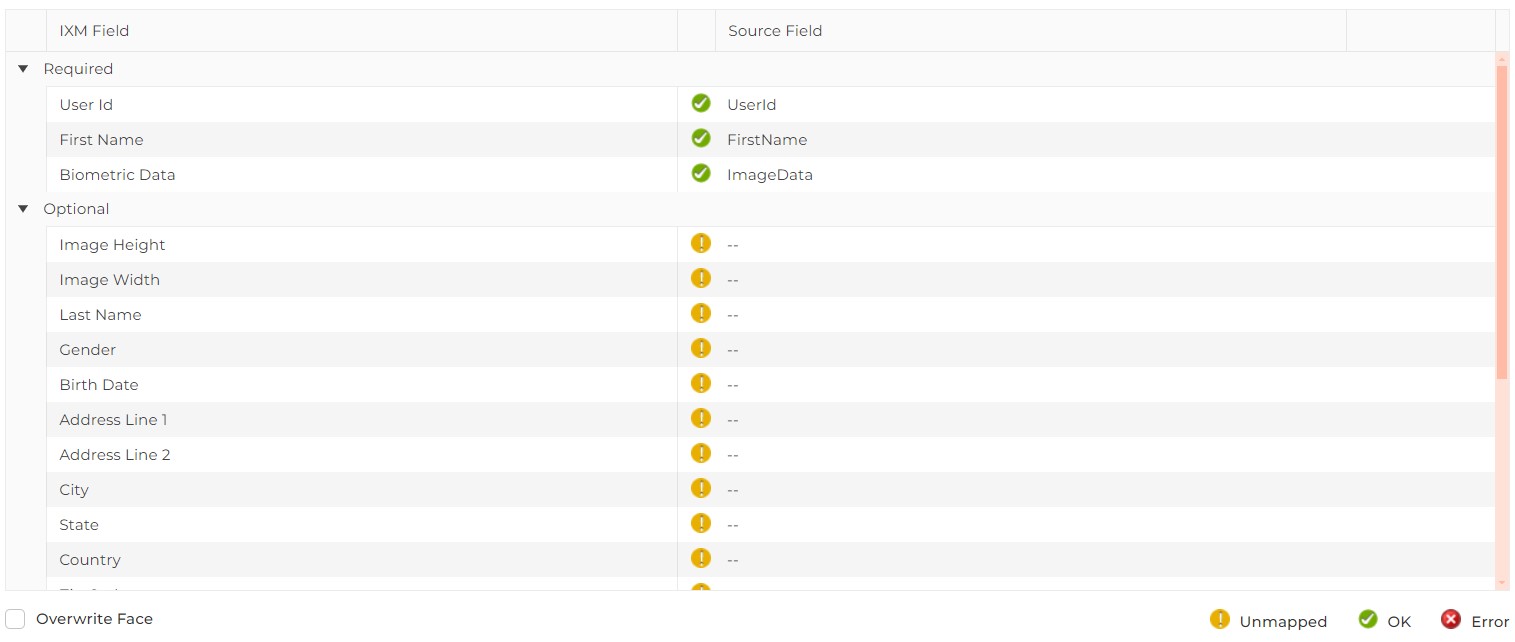
Overwrite Face
Selecting this option will allow IXM Face Convert to overwrite existing data within the database.
Click on Analyze button to see the analysis report before the actual conversion process.
Click on Back button to go back to the previous screen.
Screen Layout of Analysis
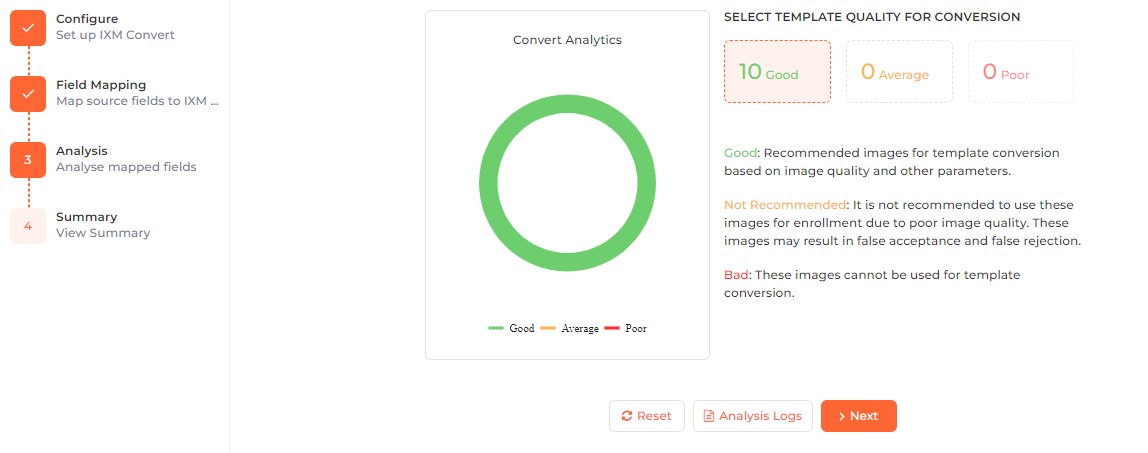
Field Description of Analysis
The analysis window provides information about the quality of images for possible conversion. The images are divided into three types of quality status - Good, Average, and Poor.
Good quality images are highly recommended for conversion whereas Average and Poor quality images are not recommended.
Click on the desired box of image quality that has to be converted.
Click on the Next button to start the process of conversion.
|
NOTE Before converting, the primary Device for face conversion should be selected from General >> Options >> Face Conversion section.
|
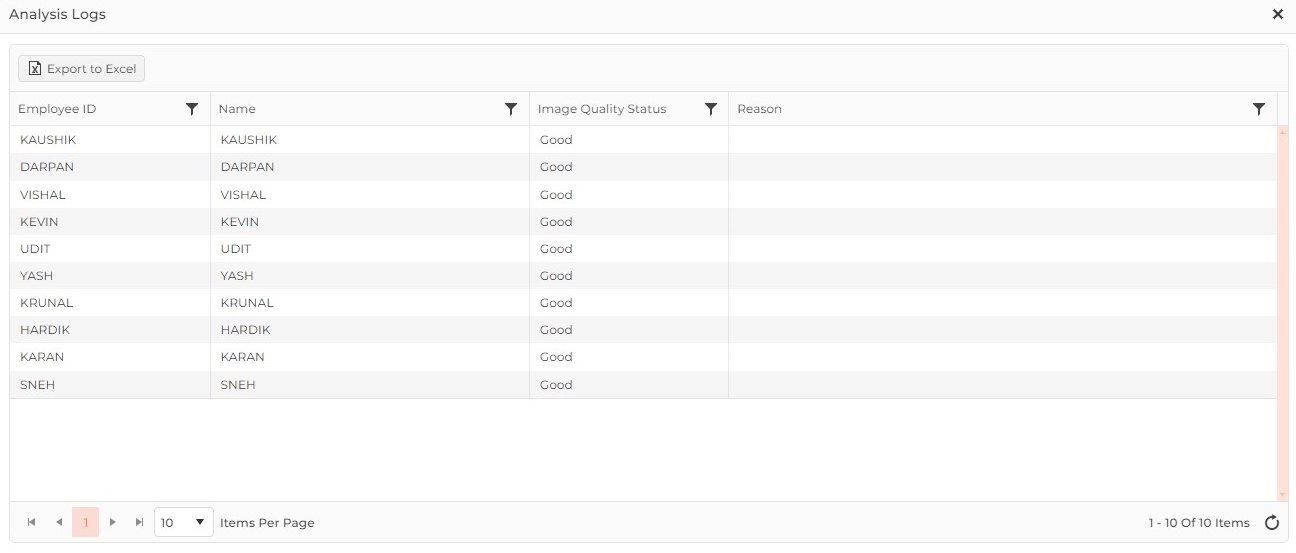
Click on the Logs button to view the quality status of all images with reasons for poor quality images.
Click on the Reset button to go back to the previous screen.
Screen Layout of Summary

Field Description of Summary
When the process is complete, a “Summary” window will display the converted User records and Biometric records.
Click on Logs button to check which User Record(s) and Biometric Record(s) were converted successfully and which failed to convert.
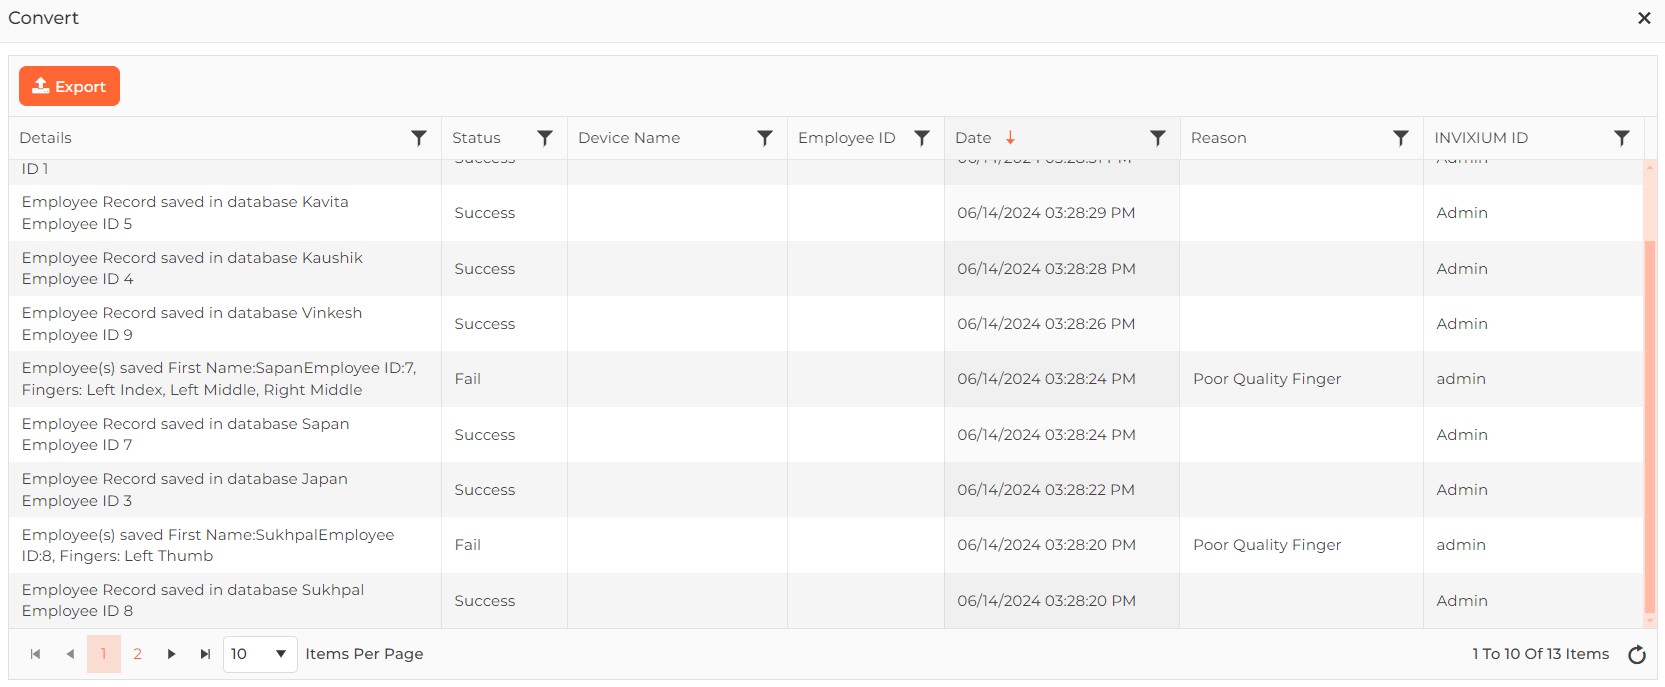
You can also refer the Logs >> Application Logs (with Type = "Face Conversion") for the status of each conversion. Each failed conversion will display its respective reason for failure.