Reports
Configure settings for reports and view or take a print out various reports through this section. It consists of following tabs -
-
Time (This tab will be visible only if IXM Time license is purchased)
-
Health (This tab will be visible only if IXM Health license is purchased)
-
Visitor (This tab will be visible only if Visitor license is purchased)
Screen Layout of General Reports

Field Description of General Reports
General Reports are available for all users from IXM WEB 2.0 version onwards.
Select Report Type:
Select the Report that you want to generate from the dropdown list. Following are the reports:
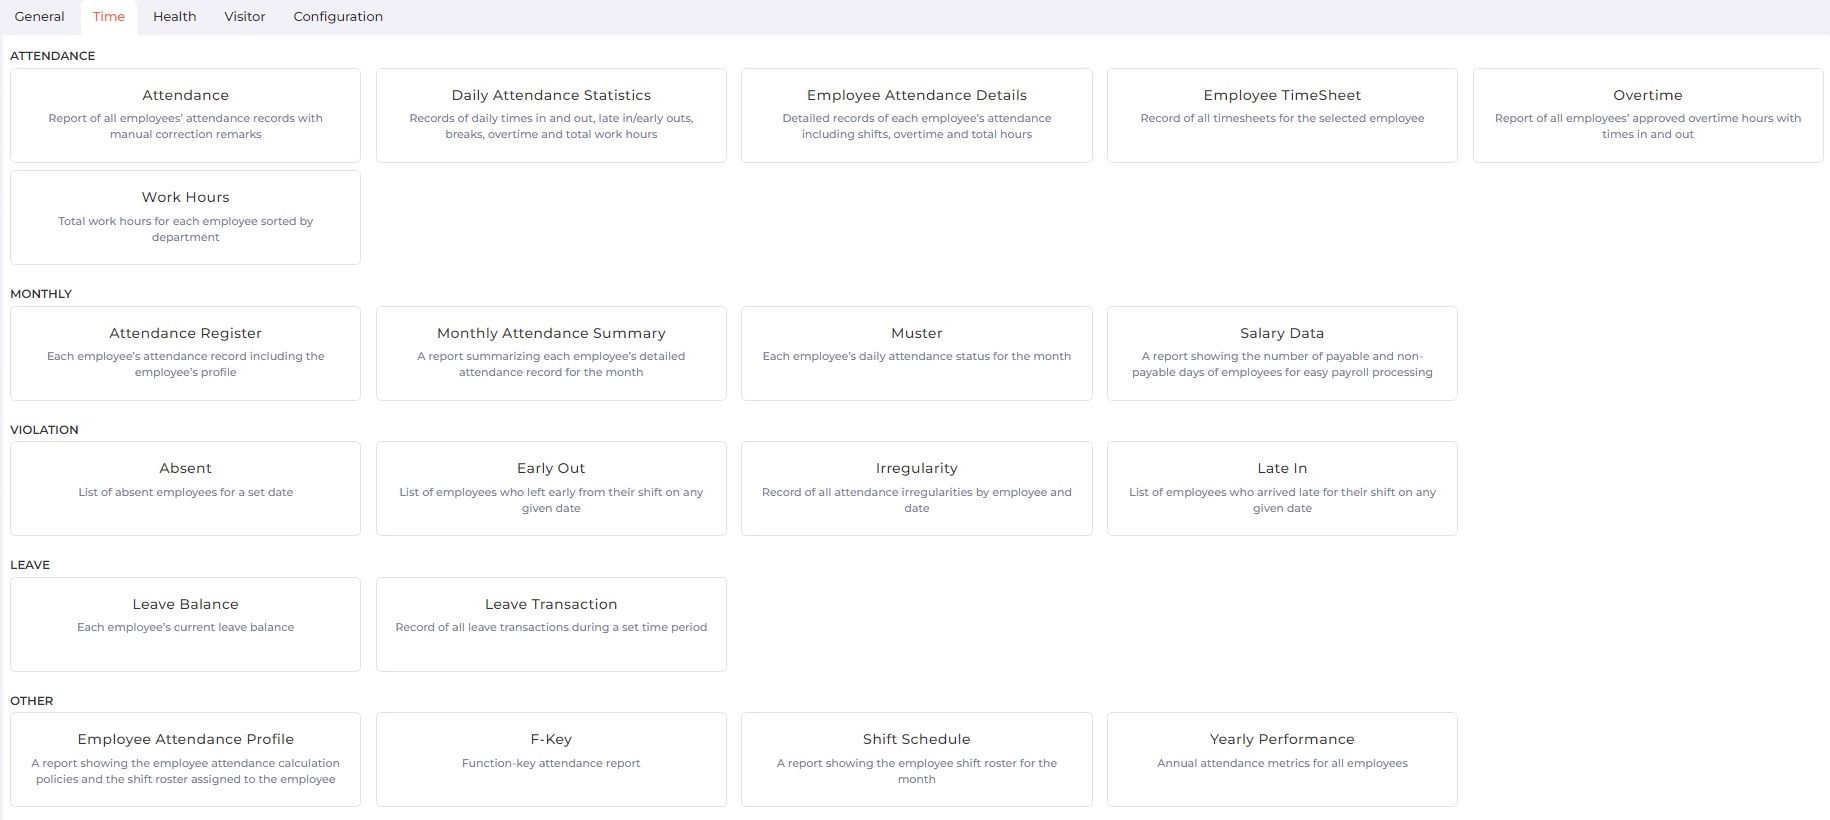
Screen Layout of Time Reports
|
NOTE This tab will be visible only if IXM Time license is purchased. You can request the License from License >> click on IXM Time icon.
|
Field Description of Time Reports
Select Report Type:
Select the Report that you want to generate from the dropdown list. Following reports are available:
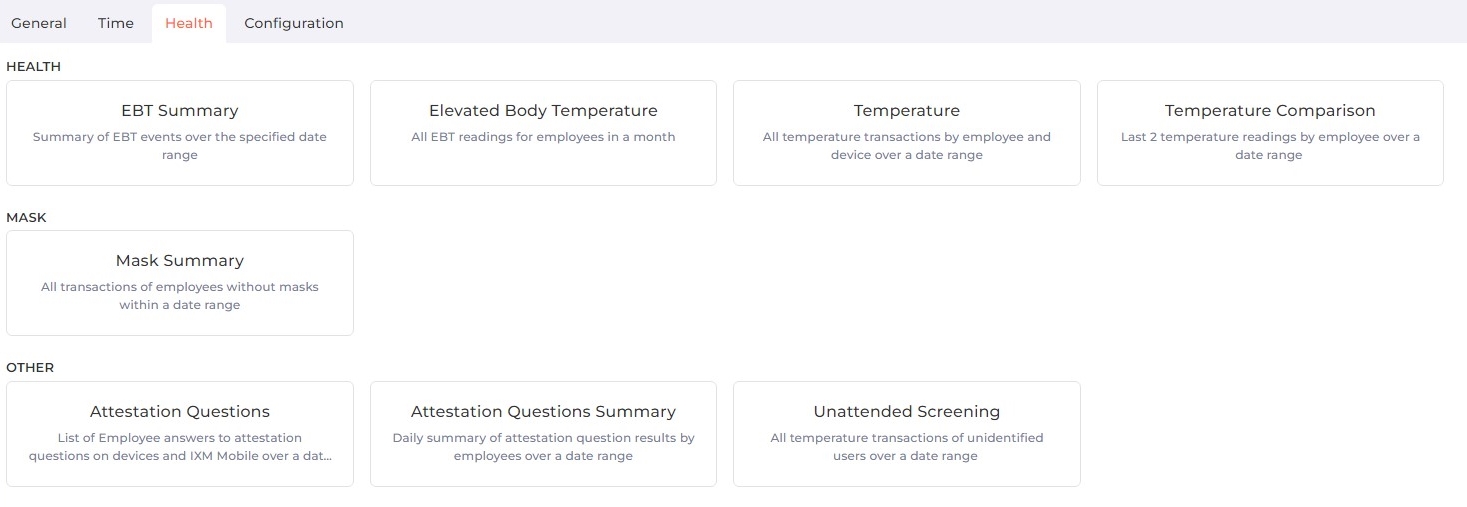
Screen Layout of Health Reports
|
NOTEThis tab will be visible only if IXM Health license is purchased. You can request License from License >> click on IXM Health icon.
|
Field Description of Health Reports
Select Report Type:
Select the Report that you want to generate from the dropdown list. Following reports are available:
Screen Layout of Visitors Reports

|
NOTEThis tab will be visible only if Visitors license is purchased. You can request License from License >> click on Visitors icon.
|
Field Description of Visitors Reports
Select Report Type:
Select the Report that you want to generate from the dropdown list. Following reports are available:
Screen Layout of Configuration
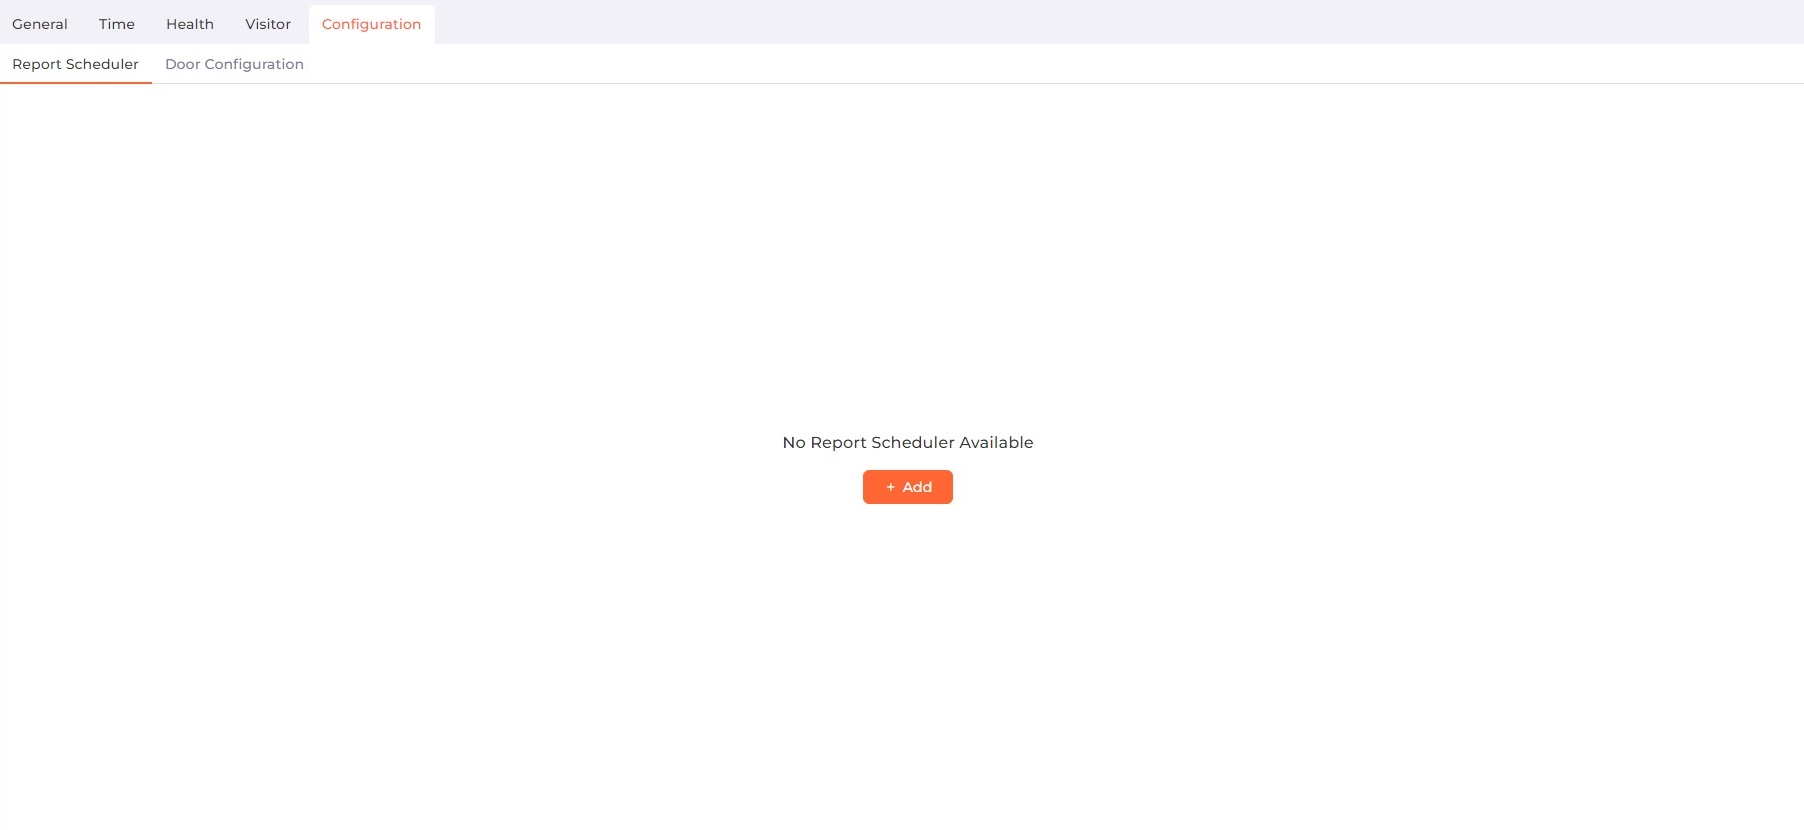
Field Description of Configuration
Using this section, you can configure the Report Scheduler and Door Settings.
Screen Layout of Report Scheduler
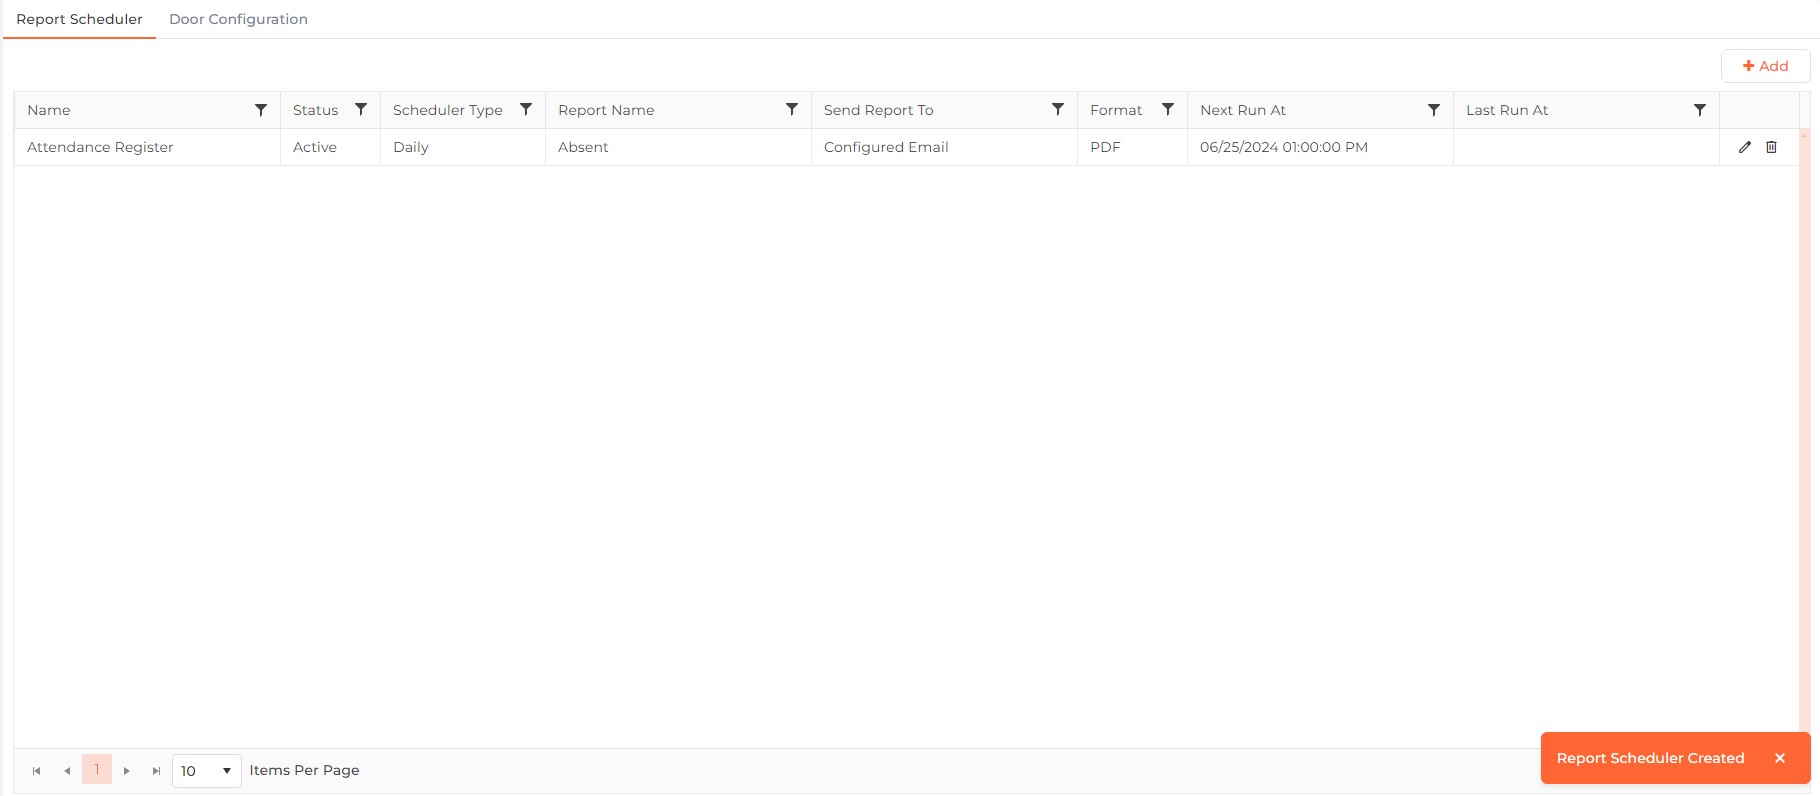
Field Description of Report Scheduler
A list of existing Report Schedulers will be displayed. If no Report Scheduler has been created, this list will be blank.
To add a new Report Scheduler, click on the Add button to add a new Report Scheduler.
To edit a Report Scheduler, click on ![]() icon in the last column of the list.
icon in the last column of the list.
The following screen will be displayed. The screen is split into two sections. On the left-hand side, you'll find a sequential list of activities, with the completed / current activity highlighted for easy reference. The right-hand section enables you to input data associated with the selected activity. The activities are as follows:
Screen Layout of General
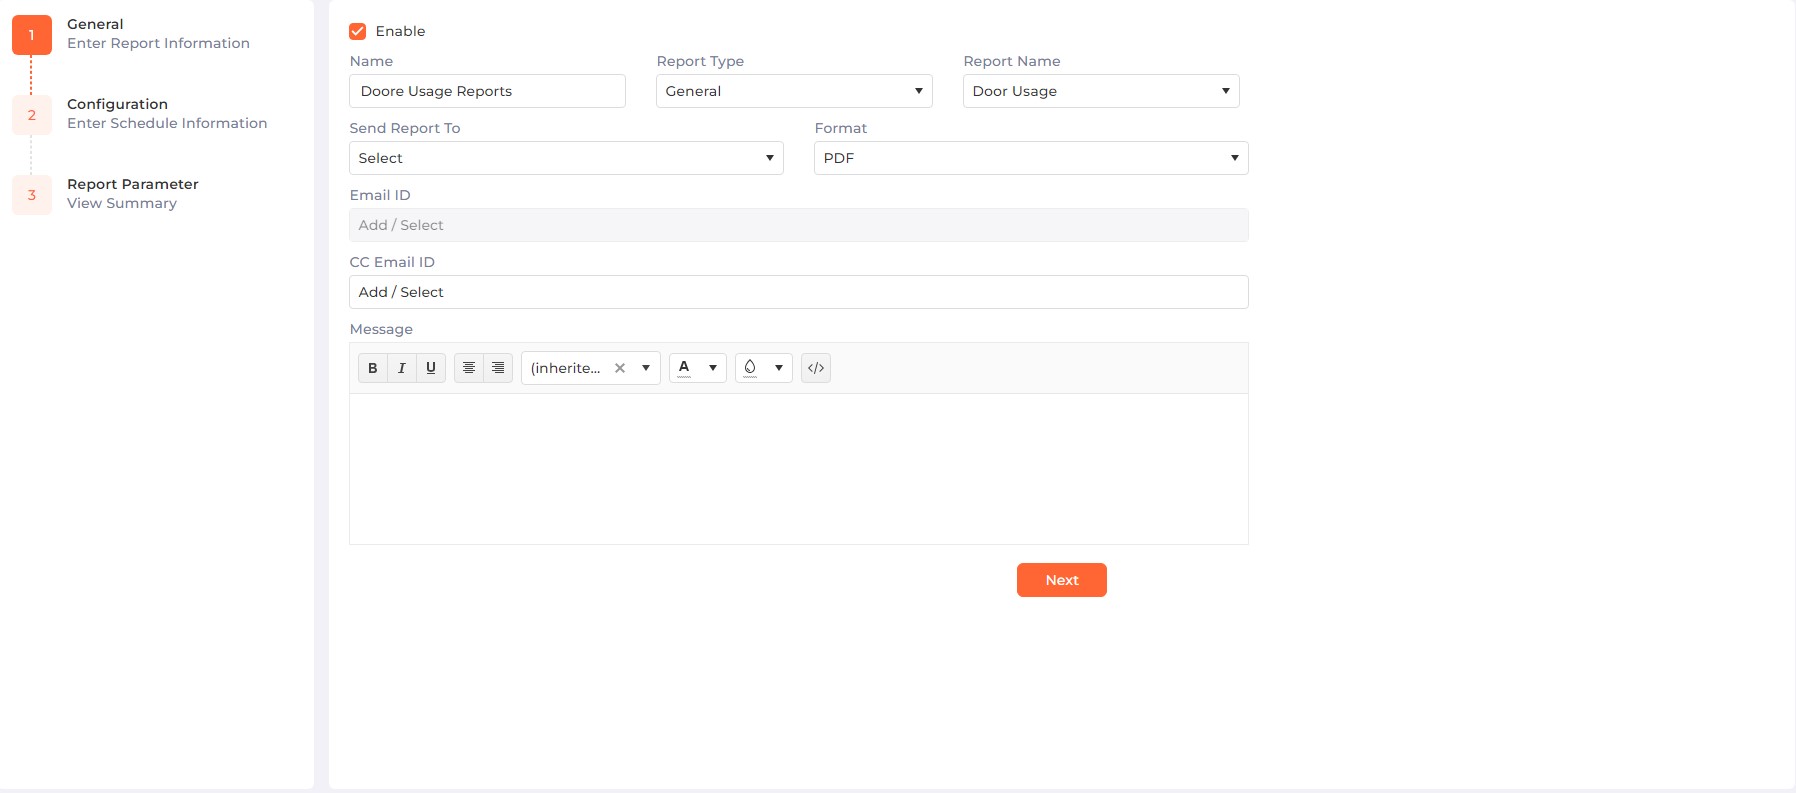
Field Description of General
Enable
Click on the checkbox to enable or disable the Report Scheduler. A check mark indicates the Scheduler is enabled.
Name:
Enter the name of the Report Scheduler.
Report Type:
Denotes the type of report for the Scheduler.
While adding, select the type from the dropdown list. The IXM WEB allows to create Report Scheduler for the following type of reports:
-
General
-
Time
While editing, the Report Type of the selected Scheduler can not be changed.
Report Name:
Denotes the report for the Scheduler. The report will be emailed automatically as per the schedule.
While adding, select the report from the dropdown list based on the selected Report Type. The IXM WEB allows to create the Report Scheduler for the following reports:
-
General
-
Door Usage
-
Employee Events
-
In Out
-
-
Time
-
Attendance Register
-
Daily Attendance Statistics
-
Employee Attendance Details
-
Monthly Attendance Summary
-
Absent
-
Employee Timesheet
-
Irregularity
-
Daily Overtime
-
Salary Data
-
Work Hours
-
Weekly Overtime
-
While editing, the Report Name of the selected Scheduler can not be changed.
Send Report To:
Denotes the receiver of the scheduled mail.
While adding, select the receiver from the dropdown list.
For General reports, you can specify the Email ID(s) to which the report should be sent as per the schedule.
The Time reports can be sent to the following type of receivers:
-
Configure Email
You can specify the Email ID(s) to which the report should be sent as per schedule.
-
Reporting Manager
The report will be sent to the logged-in employee's Reporting Manager.
-
Employee Self
The report will be sent to the logged-in employee's email id.
While editing, the Send Report To of the selected Scheduler can not be changed.
Format:
Select a specific report format for the emails that will be sent. Available formats are as follows:
-
PDF
-
Excel
-
CSV
EMAIL ID:

|
This option will be enabled only when the "Send Report To" is selected as "Configured Email". |
Enter valid email address(es) to email reports as attachments.
|
NOTE Up to 20 emails ids can be entered.
|
CC Email ID:
Enter valid email address(es) to CC email reports as attachments.
Message:
Enter the body text of the email.
Once entered, click on the Next button to continue to the next section.
Screen Layout of Configuration
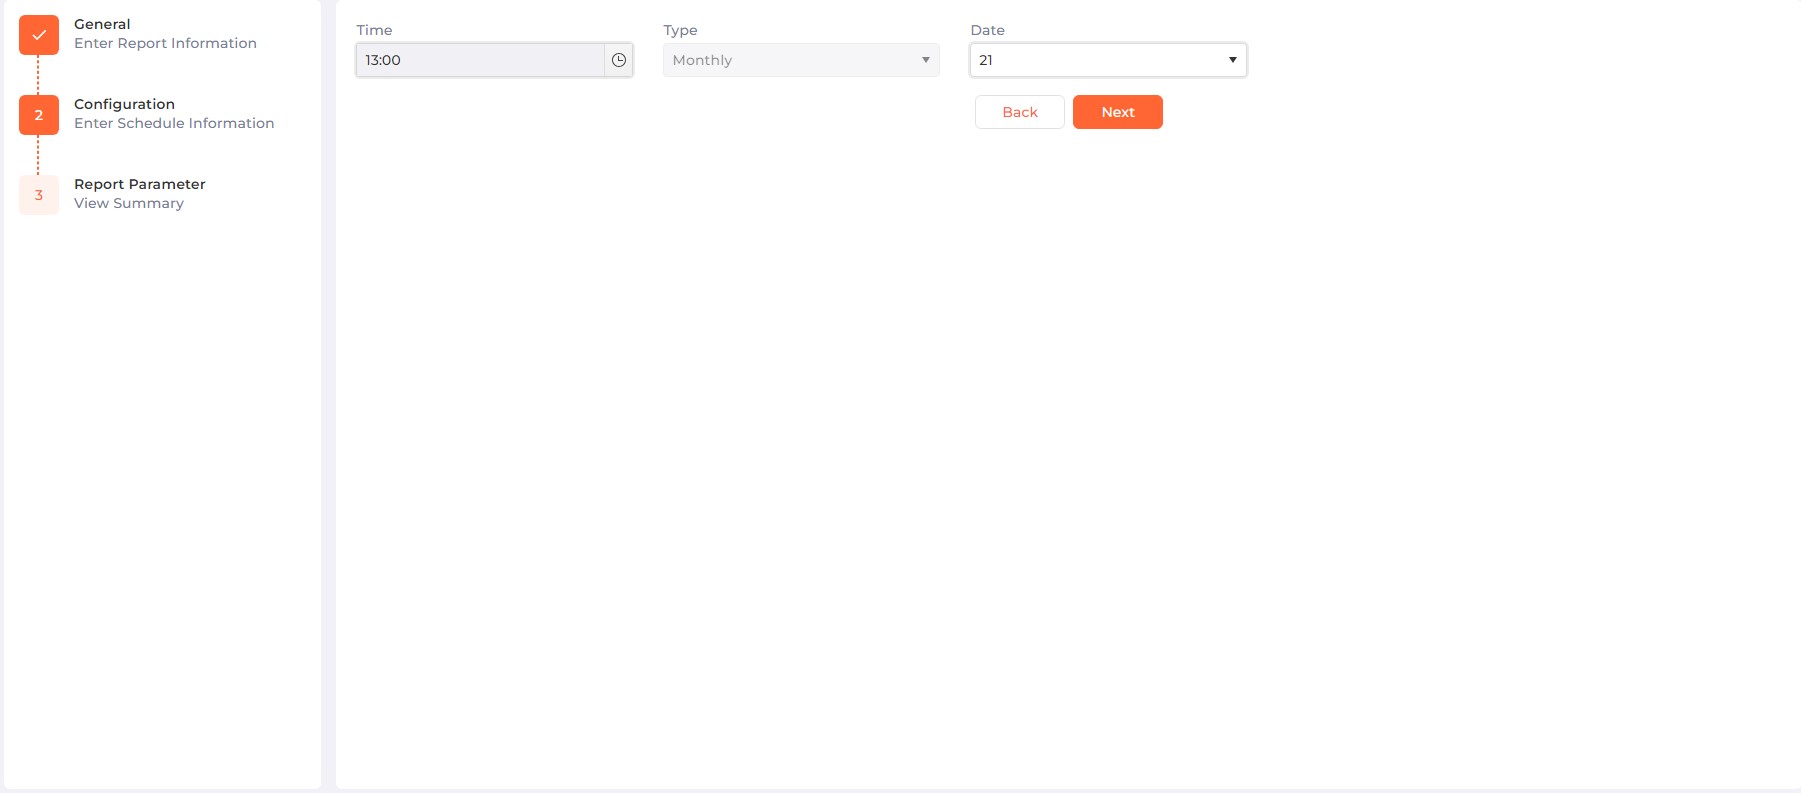
Field Description of Configuration
Time:
Select the time when the report should be sent.
Type:
Select the frequency of the scheduler from the dropdown list. The following three frequencies are provided:
-
Daily
-
Bi-Weekly
-
Monthly
If Type is selected as "Daily", the days of week will be displayed. Check the days when the report should be emailed.
If Type is selected as "Bi-Monthly", the following options will be displayed:
Week Type:
Select "Odd Week" or "Even Week" from the dropdown list to specify the week when the report should be emailed.
Next, check the days of the week when the report should be emailed.
If Type is selected as "Monthly", select the date of the month when the report should be emailed.
Once entered, click on the Next button to continue to the next section. Click on the Back button to go to the previous screen.
Screen Layout of Report Parameter
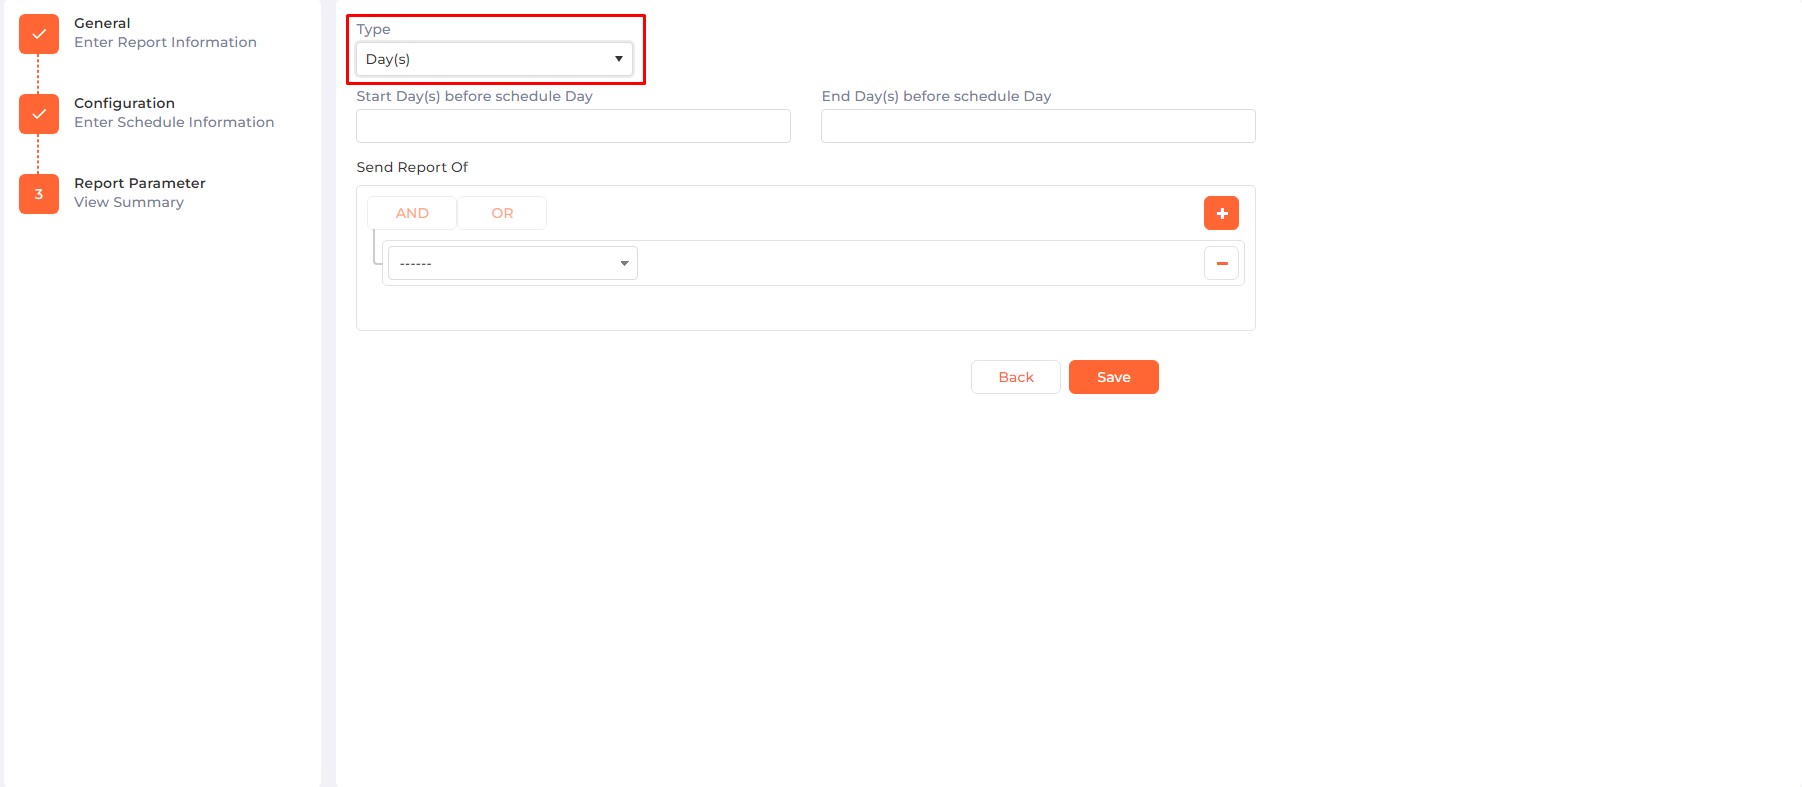
Field Description of Report Parameter
Type:
Select "Date Range" or "Day(s)" to specify the type of filter for the report data.
If the Type is selected as "Date Range", the following options will be displayed:
Start Month:
Select "Previous" from the dropdown list if you want the data starting from the previous month.
Select 'Current" from the dropdown list if you want the data starting from the current month.
Start Day:
Select the starting day of the month from when the data should be considered for the report.
End Month:
Select "Previous" from the dropdown list if you want the data up to the previous month.
Select 'Current" from the dropdown list if you want the data up to the current month.
End Day:
Select the day of the month up to which the data should be considered for the report.
If the Type is selected as "Day(s)", the following options will be displayed:
Start Day(s) before schedule day:
Enter the number of days before the schedule day starting from which the data should be considered for the report.
End Day(s) before schedule day:
Enter the number of days before the schedule day up to which the data should be considered for the report.
Send Report Of:
You can filter the data as per requirement.
Click on the + icon on the right side of the screen to create a multilevel condition. You can remove a particular condition by clicking on the - icon on its row. You can use AND and OR operators by clicking on their respective buttons on the top. The first column in the list displays the field name. The second column displays the condition and the third column accepts the value of the selected field.
Once entered, click on the Save button to save the Report Scheduler or Back button to go to the previous screen.
Screen Layout of Door Configuration

Field Description of Door Configuration
DISPLAY
Include Header
You can include customized Header image in the reports. Click on the checkbox to enable or disable the this feature. A check mark in the box indicates that the feature is enabled.
Click on Upload button to select the Header image from its respective path. Once the image is uploaded, you can preview it by clicking on Preview button.
Include Footer
You can include customized Footer image in the reports. Click on the checkbox to enable or disable the this feature. A check mark in the box indicates that the feature is enabled.
Click on Upload button to select the Footer image from its respective path. Once the image is uploaded, you can preview it by clicking on Preview button.
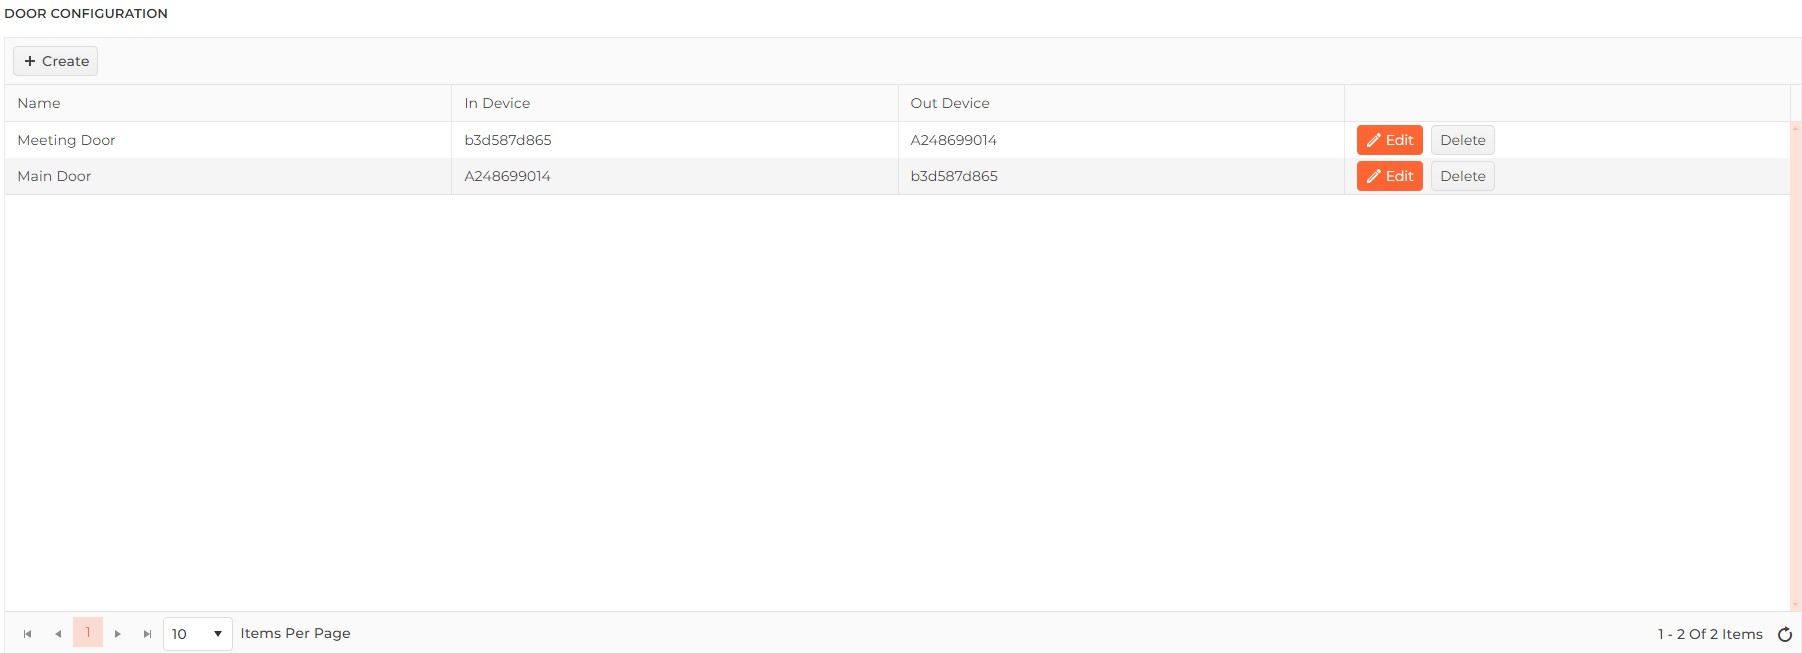
DOOR CONFIGURATION
This section allows the user to select a Device(s) as an In Device, Out Device, or both.
A list of already created Doors will be displayed. In case not even a single Door has been created, this list will be blank.
Click on Create button on the top of the list to add a new Door. As a result, a new row will be displayed in the list.
Field Description of the list -
Name:Enter the name of the Door.In Device:Click on the box to select Device to be used for entry from the dropdown list. If a single Device is used for both entry and exit, then choose the common Device.Out Device:Click on the box to select Device to be used for exit from the dropdown list. If a single Device is used for both entry and exit, then choose the common Device.Once entered, click on Update button to save the Door details.Click on Edit button to edit the Door details.Click on Delete button to delete the Door.
Click on Apply button to save the entered configuration.
