|
|
Policies
IXM Time policies allow users to manage company policies related to workforce management. Users can create, update or delete policies.
IXM Time policies are the set of rules which are applied to the users of an organization that will use biometric time and attendance. Through these policies, an organization can define the specific rules and assign them to the user(s) for time and attendance. Some policies that can be configured are – late coming time, early out time, rules regarding overtime, penalties upon breaking these rules, etc.
The following tabs store respective information -
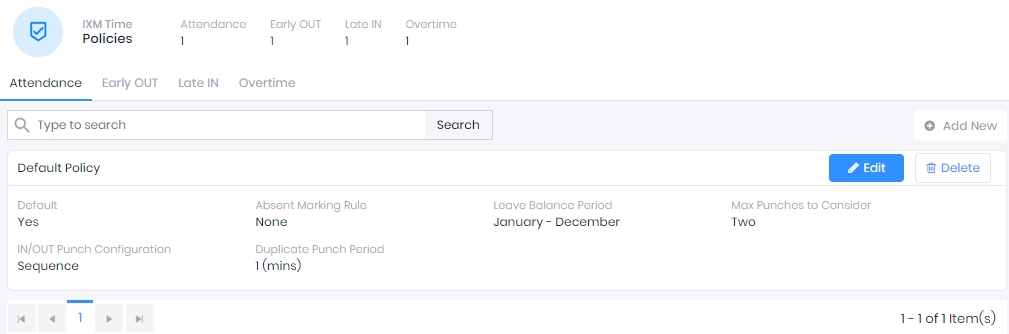
Screen Layout of Attendance
Field Description of Attendance
Configure Attendance related policies through this option. One policy will be created by default in the software. You can either modify the available policy or add a new policy.
Click on Add New button to add a new Attendance Policy or click on Edit button to edit an existing Attendance Policy. The following options will be displayed -
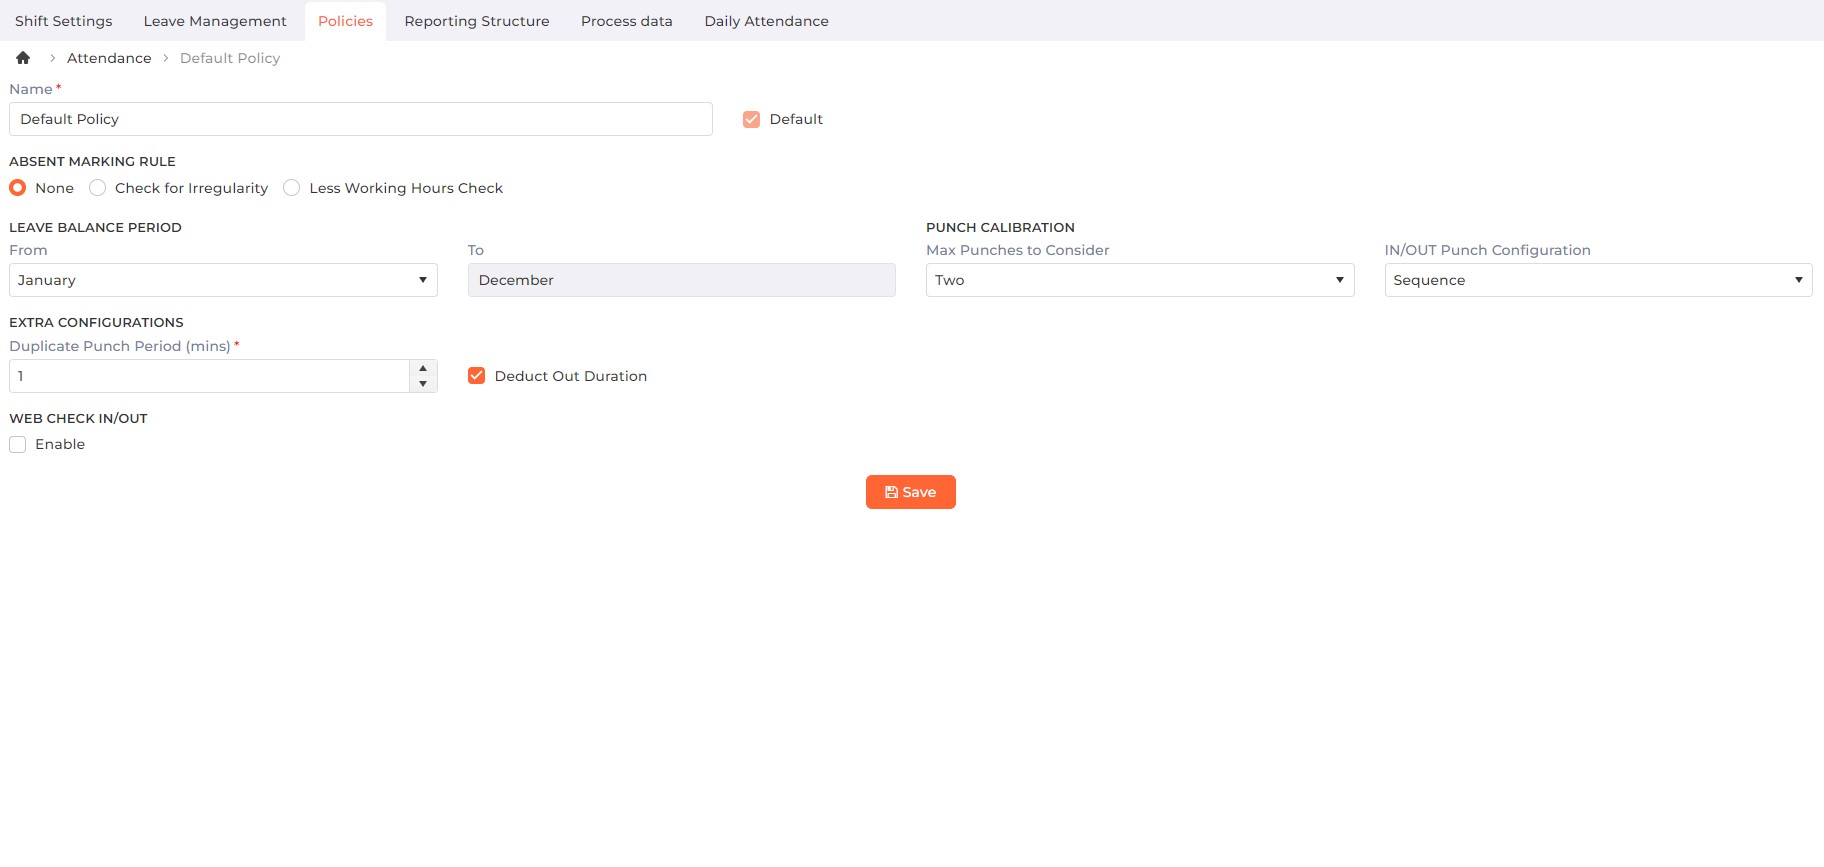
Name:
Enter the name of the Policy.
Default
Click on the checkbox to enable or disable the feature. Enable it if you want to set this Attendance Policy as the default policy.
ABSENT MARKING RULE
The system will mark the Employee absent based on the following rules:
None
Select this option if there is no additional rule defined to mark Employees absent. An Employee will be absent only if they have not completed the minimum hours required for half day or full day as defined in the shift configuration.
Check for Irregularity
Select this option if there is a rule defined to mark Employees absent. This rule will mark Employees absent based on irregularity (Late-In and Early-Out). The following options will be displayed -
Mark Absent As Per:
Select either "Monthly Count" or "Monthly Duration" from the dropdown list to consider irregularity.
Max Allowed Count:
Enter the maximum allowed count in days or duration in minutes for irregularity.
Mark Absent For:
Select either "Half Day" or "Full Day" from the dropdown list to mark absent in case of irregularity.
Irregularity Deduction:
Select either "Continuous" or "Slab Wise" from the dropdown list.
By selecting "Continuous", the system will mark absent on every Late-In or Early-Out occurrence once max allowed count has been reached.
By selecting "Slab Wise", the system will mark absent after every max occurrence count. Then the count will reset.
Less Working Hours Check
If this option is selected, the system will mark Employees absent when they are late by more than the daily allowed limit. The maximum shortfall in working hours should not be more than the daily allowed limit per day and monthly allowed limit in attendance per month. The following options will be displayed -
Daily Allowed Limit:
Enter the maximum number of minutes allowed per day for which the Employee won’t be marked absent.
Monthly Allowed Limit:
Enter the maximum number of minutes allowed per month for which the Employee won’t be marked absent.
Mark Absent For:
Select either "Half Day" or "Full Day" from the dropdown list to mark absent in case of irregularity.
LEAVE BALANCE PERIOD
From:
Select the month starting which the Leave Balance Period will be calculated.
To:
Select the month up to which the Leave Balance Period will be calculated.
PUNCH CALIBRATION
Punch (Clock In/Clock Out) calibration is used to define how many punches from an Employee should be considered when tracking their time. Based on this configuration, an employee’s total time will be calculated every day.
Max Punches to Consider:
IXM WEB users can define the maximum number of punches to be considered per day for attendance calculation from the dropdown list.
If "Two" is selected, First-In and Last-Out will be considered for attendance. Out Time will not be deducted from working hours.
If "Four" is selected, Four Punches: First-In, Break Start, Break End, and Last-Out will be considered for attendance calculation. Break duration will be deducted from working hours as per the break policy defined in a shift.
If "Infinite" is selected, all punches will be considered for attendance calculation. Out time will be deducted from working hours.
In/Out Punch Configuration:
IXM WEB users can define which punches to be considered for attendance calculation.
If "FKey" is selected,
Fkey Punches (check-in, check-out, break start, break end) will be considered valid for attendance calculation.
Employee work hours, break duration, and out time will be calculated as per the Fkey selection.
The Employee must select Fkey at the time of authentication to mark the attendance.
If "Device Mode" is selected,
Attendance will be calculated based on device mode (entry or exit) defined at the time of device registration.
Employee’s work hours and out time will be calculated as per the device mode (entry or exit).
If "Sequence" is selected,
In and Out punches will be defined as per sequential logic. For example, 1st punch – IN, 2nd punch - OUT, 3rd punch-IN, 4th punch- OUT, etc.
Employee’s work hours and out time will be calculated as per the device mode (entry or exit).
EXTRA CONFIGURATIONS
A few additional settings to help users calculate the employee time more precisely and to remove ambiguity.
Duplicate Punch Period (mins):
Specify the time in minutes between punches that would be considered as duplicate punches (in case an employee authenticates themselves twice by mistake). If the system identifies a duplicate punch then the first punch of the day will be considered as an in punch and the last punch of the day will be considered as an out punch.
Click on Save button to save the Attendance Policy. Click on Cancel button to discard the action.
Select the Attendance Policy that needs to be deleted and click on Delete button. The Default Policy can not be deleted. The application will show a confirmation message as follows -
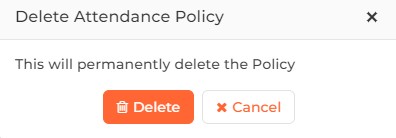
Click on Delete button to delete the selected Attendance Policy or Cancel button to discard the action.
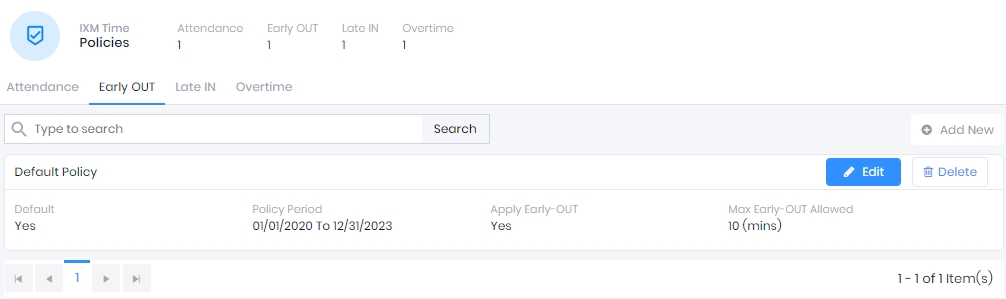
Screen Layout of Early OUT
Field Description of Early OUT
One policy will be created by default in the software. You can either modify the available policy or add a new policy.
Click on Add New button to add a new Early OUT Policy or click on Edit button to edit an existing Early OUT Policy. The following options will be displayed -
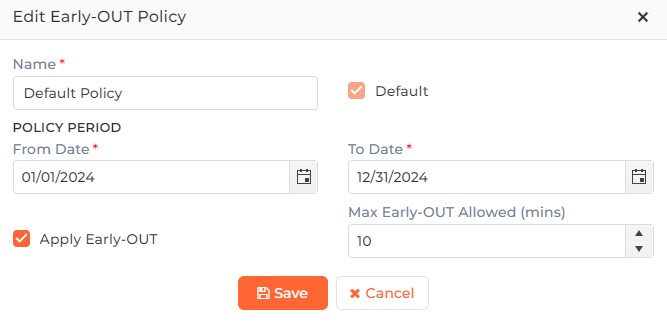
Name:
Enter the name of the Policy.
Default
Click on the checkbox to enable or disable the feature. Enable it if you want to set this Early OUT Policy as the default policy.
POLICY PERIOD
Specify the date range for which the Early Out Policy will be applicable.
From Date:
Enter or select the date starting which the Early OUT Policy will be applicable.
To Date:
Enter or select the date up to which the Early OUT Policy will be applicable.
Max Early-Out Allowed:
Enter the punch time in minutes up to which an Employee will be allowed to leave early. For example, if this is set to 5 minutes and the Check-Out time is 5 PM then even if the Employee leaves at 4:55 PM, they will not be marked absent.
Apply Early-OUT
Enable this flag to put this policy into effect.
Click on Save button to save the Early OUT Policy. Click on Cancel button to discard the action.
Select the Early OUT Policy that needs to be deleted and click on Delete button. The Default Policy can not be deleted. The application will show a confirmation message as follows -

Click on Delete button to delete the selected Early OUT Policy or Cancel button to discard the action.
Screen Layout of Late IN

Field Description of Late IN
One policy will be created by default in the software. You can either modify the available policy or add a new policy.
Click on Add New button to add a new Late IN Policy or click on Edit button to edit an existing Late IN Policy. The following options will be displayed -
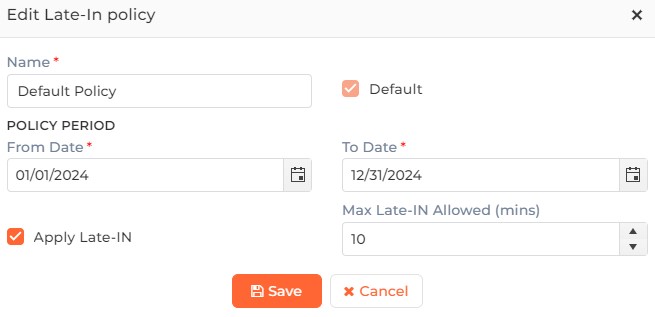
Name:
Enter the name of the Policy.
Default
Click on the checkbox to enable or disable the feature. Enable it if you want to set this Late IN Policy as the default policy.
POLICY PERIOD
Specify the date range for which the Late IN Policy will be applicable.
From Date:
Enter or select the date starting which the Late IN Policy will be applicable.
To Date:
Enter or select the date up to which the Late IN Policy will be applicable.
Max Late-IN Allowed:
Enter the punch time in minutes up to which Employee will be allowed to come late. For example, if this is set to 5 minutes and the Check-In time is 9 AM, then even if the employee arrives at 9:04 AM, they will not be marked absent.
Apply Late-IN
Enable this flag to put this policy into effect.
Click on Save button to save the Late IN Policy. Click on Cancel button to discard the action.
Select the Late IN Policy that needs to be deleted and click on Delete button. The Default Policy can not be deleted. The application will show a confirmation message as follows -
Click on Delete button to delete the selected Late IN Policy or Cancel button to discard the action.
Screen Layout of Overtime
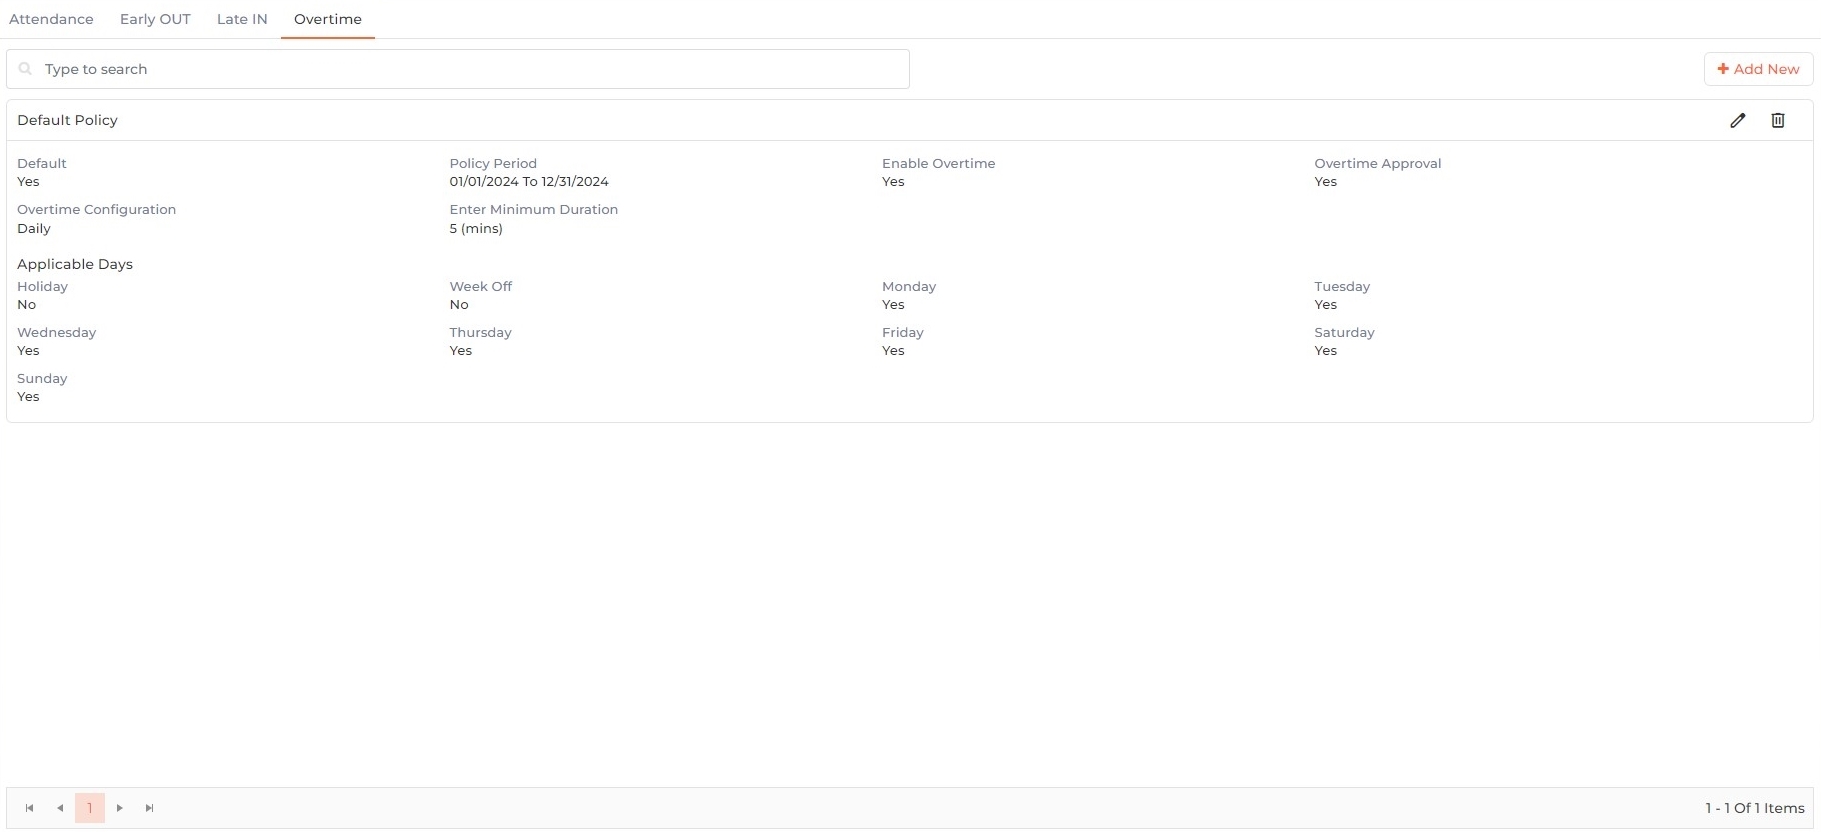
Field Description of Overtime
One policy will be created by default in the software. You can either modify the available policy or add a new policy.
Click on Add New button to add a new Overtime Policy or click on Edit button to edit an existing Overtime Policy. The following options will be displayed -
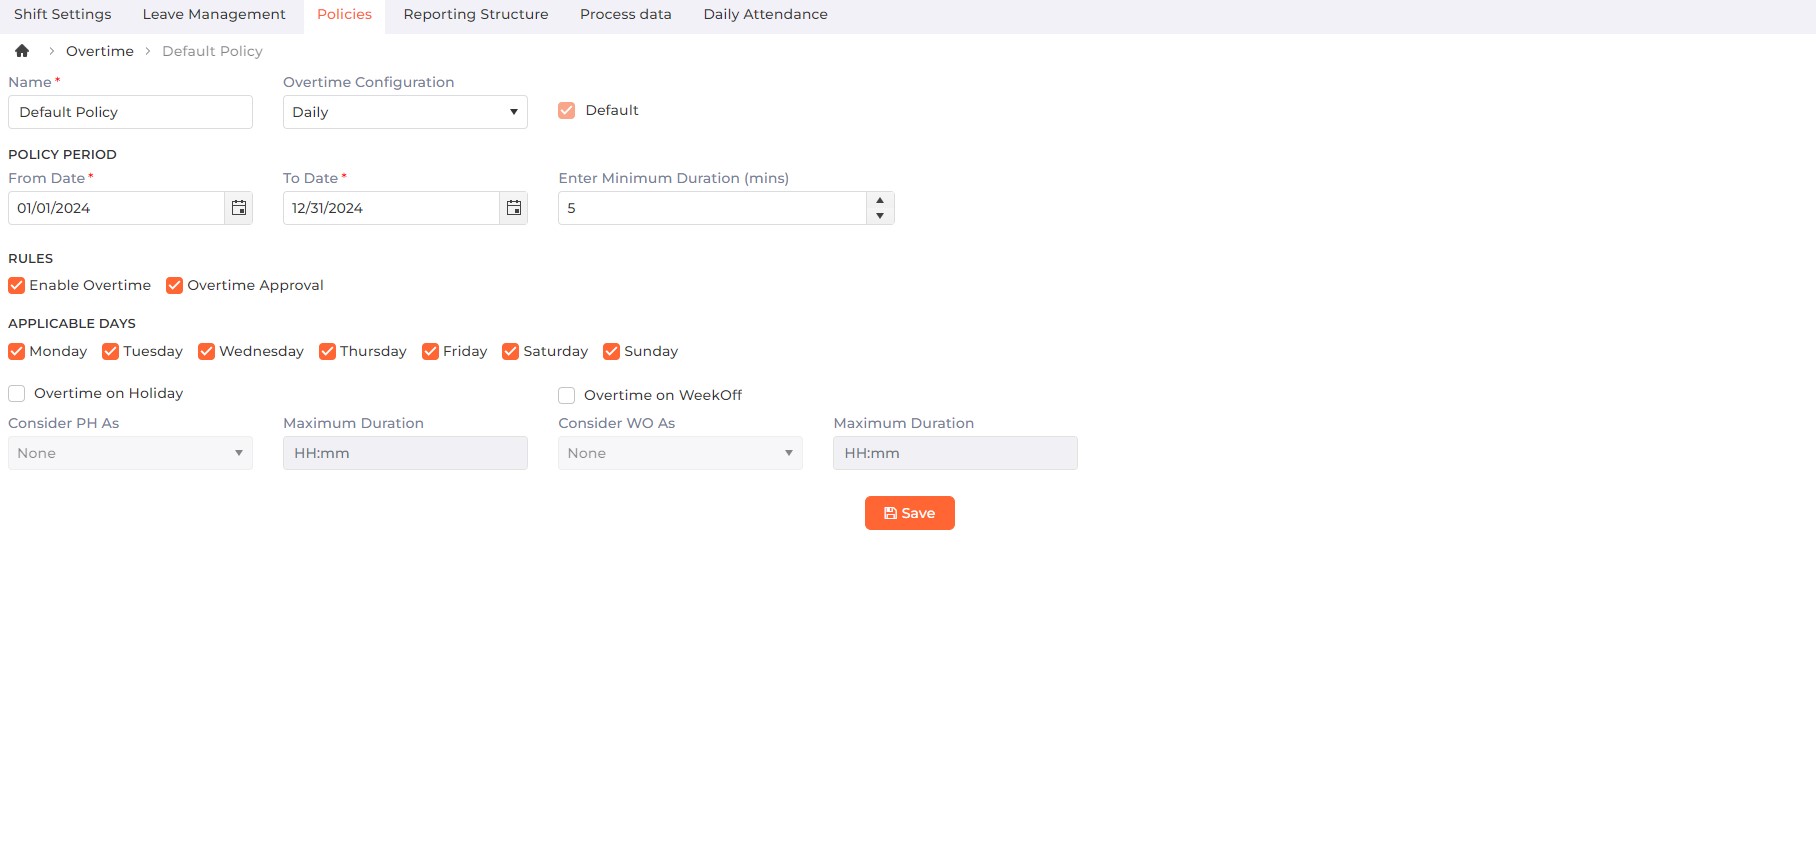
Name:
Enter the name of the Policy.
Overtime Configuration:
Select “Daily” to create a daily Overtime Policy and select “Weekly” to create a weekly Overtime Policy.
Week Start Day:

|
This option will be displayed only if Overtime Configuration is selected as "Weekly". |
Select the start day of the week for the weekly Overtime Policy.
Default
Click on the checkbox to enable or disable the feature. Enable it if you want to set this Overtime Policy as the default policy.
POLICY PERIOD
Specify the date range for which the Overtime Policy will be applicable.
From Date:
Enter or select the date starting which the Overtime Policy will be applicable.
To Date:
Enter or select the date up to which the Overtime Policy will be applicable.
Enter Minimum Duration (mins):
This option will be displayed only if Overtime Configuration is selected as "Daily".
Employees will have to work a minimum of these many minutes over the regular hours to consider it overtime.
RULES
Enable Overtime
Click on the checkbox to enable or disable the feature. Enable this flag to put this policy into effect.
Overtime Approval:
Click on the checkbox to enable or disable the feature. Enable this flag to activate a mandatory approval process for overtime requests. Disable this option for auto-approved overtime requests.
APPLICABLE DAYS
Select the day(s) on which Overtime Policy will be applicable and considered in attendance calculation. You can select the applicable days by clicking on their respective checkboxes.
Overtime On Holiday
Click on the checkbox to enable or disable the feature. Enable this flag to consider overtime on public holidays.
Overtime on Week Off:
Click on the checkbox to enable or disable the feature. Enable this flag to consider overtime on week offs.
Considered PH As:
|
|
This option will be displayed only if Overtime Configuration is selected as "Weekly" and Overtime On Holiday feature is enabled. |
Select "None" option for not considering overtime on public holidays.
Select “Fixed” option to consider fixed overtime on public holidays.
Provide “Maximum Duration” for calculating overtime on public holidays. If an employee’s overtime hours on a public holiday are less than the mentioned “Maximum Duration” then actual overtime will be calculated and if the employee’s overtime hours are greater than the mentioned “Maximum Duration” then fixed overtime (i.e. the value mentioned in “Maximum Duration” field) will be calculated.
Select “Actual” option for considering actual overtime based on the Employee’s attendance for public holidays.
Considered WO As:
|
|
This option will be displayed only if Overtime Configuration is selected as "Weekly" and Overtime On WeekOff feature is enabled. |
Select “None” option for not considering overtime on week offs.
Select “Fixed” option to consider fixed overtime on Week Offs.
Provide “Maximum Duration” for calculating overtime on week offs. If an employee’s overtime hours on a week off are less than the mentioned “Maximum Duration” then actual overtime will be calculated and if the employee’s overtime hours are greater than the mentioned “Maximum Duration” then fixed overtime (i.e. the value mentioned in “Maximum Duration” field) will be calculated.
Select “Actual” option for considering actual overtime based on an employee’s attendance for a week off.
WEEKLY OVERTIME CONFIGURATION
|
|
This option will be displayed only if Overtime Configuration is selected as "Weekly". |
Provide “From”, “To” and “Minimum OT” duration as per the requirement which will be considered for “Base Hours” and “OT Hours” calculation.
Click on Save button to save the Overtime Policy. Click on Cancel button to discard the action.
Select the Overtime Policy that needs to be deleted and click on Delete button. The Default Policy can not be deleted. The application will show a confirmation message as follows -
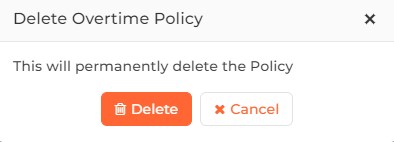
Click on Delete button to delete the selected Overtime Policy or Cancel button to discard the action.