|
|
Configuration
|
NOTE Only an Administrator can configure the settings.
|
Configuring the Visitor module consists of three sections:
Screen Layout of Location
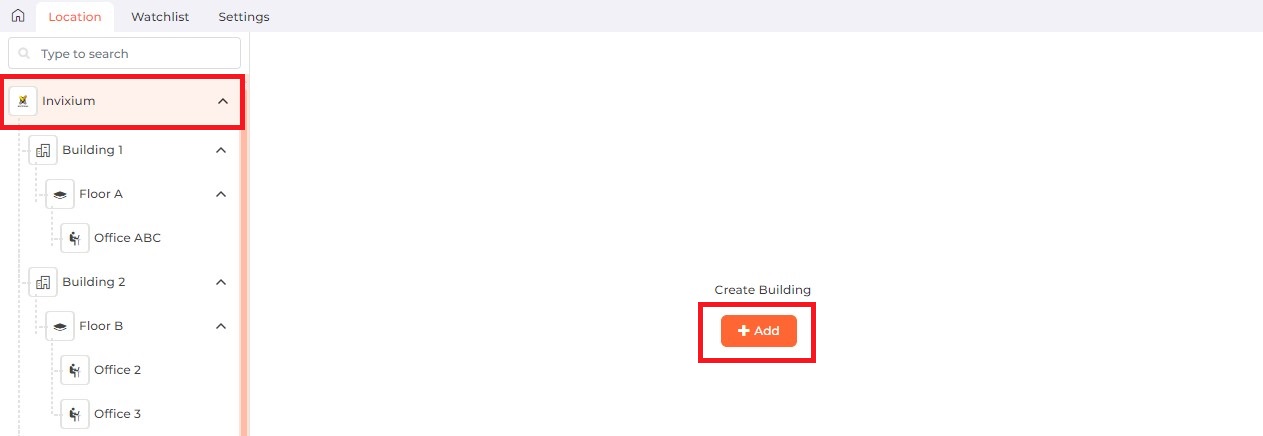
Use this section to create or modify the structure of your company. A structure supports the following three levels and their respective device(s):
-
Building
-
Floor
-
Office
Field Description of Location
The screen is divided into two sections. The left-hand section displays the existing hierarchical structure, and the right-hand section shows the information related to the currently selected item on the left-hand list.
|
NOTE The default Company Name specified through Company >> Organization Hierarchy will be displayed at the topmost level and cannot be changed.
|
Search:
You can search for a particular Building/Floor/Office by entering its full or partial name. Once entered, press the <ENTER> key. The list will be refreshed with data matching the entered name.
To create a new Building, select the Company Name in the left-hand section, and click the Add button in the right-hand section as shown below:

To edit a Building, select it from the left-hand section. The right-hand section will show the information on the selected Building. Click the Edit button to edit that Building as shown below:

The following screen will be displayed to enter Building details:
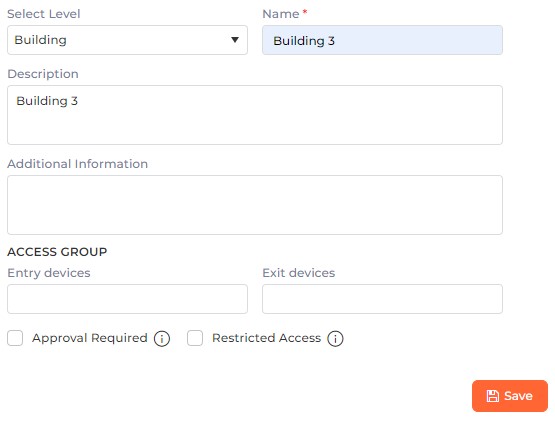
Select Level:
By default, the topmost level in the hierarchy is represented as “Building”.
Name:
Enter the name of the Building.
Description:
Enter the description of the Building.
Additional Information:
Enter additional information related to the Building.
ACCESS GROUP
Entry devices:
Denotes the device(s) on which a visitor has to authenticate while entering the Building.
Click on the field to access a list of Devices defined from the Devices section. Select the desired Device(s) from the dropdown list.
Exit devices:
Denotes the device(s) on which a visitor has to authenticate while exiting the Building.
Click on the field to access a list of Devices defined from the Devices section. Select the desired Device(s) from the dropdown list.
Approval Required
Click on the checkbox to enable or disable the feature. A tick mark in the box indicates the feature is enabled.
If this feature is enabled, all visits to this building should be approved.
Restricted Access
Click on the checkbox to enable or disable the feature. A click mark in the box indicates the feature is enabled.
If this feature is enabled, visits to this buildings are not required to be approved. Please note that restricted access to visits can be given by the administrator only.
Once you have entered all the details, click on the Save button to save the Building.
Click on the ![]() icon at the top left corner of the screen to go back to the previous screen.
icon at the top left corner of the screen to go back to the previous screen.
Select the parent level from the left-hand section. For example, select the Building if a Floor / Office is to be added under it or select the Floor if an Office is to be added under it. The right-hand section will display the information of the selected level as follows:

Click on the Add button to add a new level under the selected one, or the Edit button to edit that level. The following screen will be displayed to enter details:
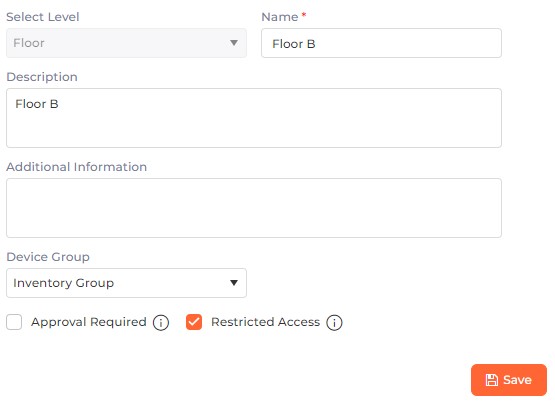
Select Level:
While adding a new level, select the sub-level from the dropdown list. Refer to the following table for level hierarchy:
| Parent level | Sub-Level |
| Company Name | Building |
| Building | Floor / Office |
| Floor | Office |
| Office | - |
While editing, the Level cannot be changed.
Name:
Enter the name of the level.
Description:
Enter the description of the level.
Additional Information:
Enter additional information related to the level.
Device Group:
Denotes the Device Group for the level. A visitor can authenticate on devices belonging to the selected Device Group only.
Click on the field to access a list of Device Groups defined from the Devices >> Manage Device Group section. Select the desired Device Group from the dropdown list.
Approval Required
Click on the checkbox to enable or disable the feature. A tick mark in the box indicates the feature is enabled.
If this feature is enabled, all visits to this floor / office should be approved.
Restricted Access
Click on the checkbox to enable or disable the feature. A tick mark in the box indicates the feature is enabled.
If this feature is enabled, visits to this floor / office are not required to be approved. Please note that restricted access to visits can be given by the administrator only
Once you have entered all the details, click on the Save button to save the Floor / Office.
Click on the ![]() icon at the top left corner of the screen to go back to the previous screen.
icon at the top left corner of the screen to go back to the previous screen.
To delete a Location, hover the mouse over it and click the ![]() icon.
icon.
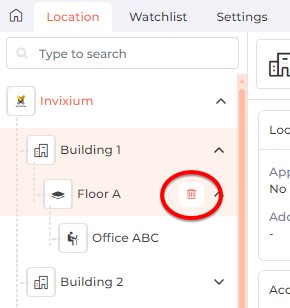
The application will display a confirmation message. Click on the Delete button to delete the selected Location structure or the Cancel button to discard the action.

|
NOTE A Location can not be deleted if it is used in Application User Rights.
|
Screen Layout of Watchlist

A Watchlist is a list of individuals and companies that require close surveillance for specific reasons. It is used by security to identify and flag these entities before they enter the premises. During the visitor screening, the application checks if the visitor is listed in the Watchlist and issues alerts to determine whether access should be granted or denied. If no companies / individuals have been added yet, this list will be empty.
Field Description of Watchlist
Search:
You can search for a particular Visitor / Company by entering its full or partial name. Once entered, press the <ENTER> key. The list will be refreshed with data matching the entered name.
Click on the  button in the top right corner of the screen to add a new Visitor. To edit a Visitor, click on the
 ![]() icon in the last column of its row. The following screen will be displayed:
icon in the last column of its row. The following screen will be displayed:

Select Type:
While adding a new Visitor, Select "Visitor" from the dropdown list.
While editing a Visitor, this field will remain disabled. The Type cannot be changed.
First Name:
Enter the first name of the visitor.
Last Name:
Enter the last name of the visitor.
Contact:
Enter the contact number of the visitor.
Email:
Enter the email address of the visitor.
Proof ID:
Enter the proof ID of the visitor.
Company Name:
Enter the company name of the visitor.
Once you have entered all the details, click on the Save button to save the Visitor in the Watchlist. Click on the Cancel button to discard the action.
Click on the  button at the top right corner of the list to add a new Company. To edit a Company, click on the
 ![]() icon in the last column of its row. The following screen will be displayed:
icon in the last column of its row. The following screen will be displayed:

Select Type:
While adding a new Company, Select "Company" from the dropdown list.
While editing a Company, this field will remain disabled. The Type cannot be changed.
Name:
Enter the name of the Company.
Short Name:
Enter the short name of the Company.
Domain Name:
Enter the domain name of the Company.
Contact:
Enter the contact number of the Company.
Location:
Enter the location of the Company.
Address:
Enter the address of the Company.
Once you have entered all the details, click on the Save button to save the Company in the Watchlist. Click on the Cancel button to discard the action.
To delete a Company / Visitor, click on the ![]() icon in the last column of its row. The deleted Company / Visitor will be removed from the list.
icon in the last column of its row. The deleted Company / Visitor will be removed from the list.
Screen Layout of Settings

Field Description of Settings
VISITOR DETAILS
ID Prefix Type:
Specify the prefix that should be used while creating the Visitor’s ID.
Select “Initials” from the dropdown list if you want the Visitor’s ID to start with some alphabet(s).
Select "Start Value" from the dropdown list if you want the Visitor's ID to start with a particular numeric value.
ID Prefix Value:
Enter the value with which the Visitor’s ID should be prefixed depending upon the selected “ID Prefix Type”.
AUTO DELETE VISIT AND VISITOR DETAILS
Status
Click on the checkbox to enable or disable the feature. A tick mark in the checkbox indicates the feature is enabled. Enabling this feature will automatically delete the visit and visitor data from the visit list.
Delete Data After (Days):
Enter the number of days after which the visit and visitor data should be deleted automatically.
SCREENING CONFIGURATION
All Visitors
Click on the checkbox to enable or disable the feature. A tick mark in the box indicates the feature is enabled.
If this feature is enabled, all visitors will be screened before entering the premises.
If this feature is disabled, none of the visitors will be screened.
VIP Visitors
Click on the checkbox to enable or disable the feature. A tick mark in the box indicates the feature is enabled.
If this feature is enabled, VIP visitors will be screened before entering the premises.
If this feature is disabled, VIP visitors will not be screened.
All Visits
Click on the checkbox to enable or disable the feature. A tick mark in the box indicates the feature is enabled.
If this feature is enabled, a visitor will be screened for all visits.
If this feature is disabled, once a visitor has been screened, they will not be screened for subsequent visits.
MISCELLANEOUS CONFIGURATION
Security Clearance
Click on the checkbox to enable or disable the feature. A tick mark in the box indicates the feature is enabled.
If this feature is enabled, security clearance becomes mandatory for all visitors before entering the premises.
If this feature is disabled, security clearance will not be done for any visitor.
Visitor Access based on Security Clearance

This option will be enabled only if Security Clearance feature is enabled.
Click on the checkbox to enable or disable the feature. A tick mark in the box indicates the feature is enabled.
If this feature is enabled, the visitor will not be allowed to enter the premises if their security clearance is rejected.
If this feature is disabled, the visitor will be allowed to enter the premises even if their security clearance is rejected.
Host Approval For Walk-in Visitor
Click on the checkbox to enable or disable the feature. A tick mark in the box indicates the feature is enabled.
If this feature is enabled, host approval is mandatory for walk-in visitors to enter the premises. A Quick Visit generated by the receptionist will not be accessible to the security personnel until it is approved by the host.
If this feature is disabled, a host's approval will not be required for walk-in visitors. They will be allowed to enter the premises after receiving security approval.
FACE CONVERSION
Profile Image to face template
Click on the checkbox to enable or disable the feature. A tick mark in the box indicates the feature is enabled. Enabling this feature allows to validate the face template of the visitor against their profile image at the time of screening.
Primary Device:
Select the Primary Device from the dropdown list on which the visitor's face will be captured.

Only registered TITAN or TFACE devices will be displayed.
TOLERANCE TIME (MINS)
Entry:
Enter the duration, in minutes, for which the visitor can check in before the scheduled visit start time. For example, if a visit start time is 10.00 hrs, and the tolerance time for Entry is 30 minutes, the visitor will be allowed to check-in at 9.30 hrs.
Exit:
Enter the duration, in minutes, for which the visitor can check out after the scheduled visit end time. For example, if a visit end time is 15.00 hrs, and the tolerance time for Exit is 20 minutes, the visitor will be allowed to check-out by 15.20 hrs.
READERS
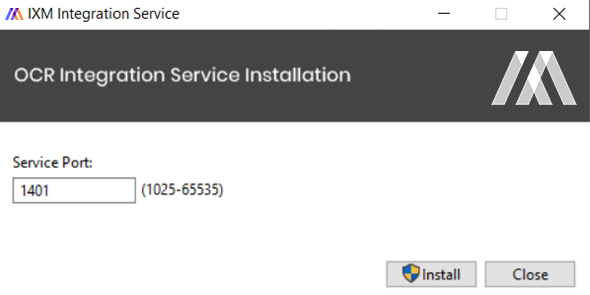
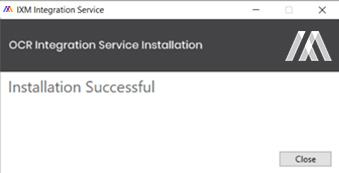
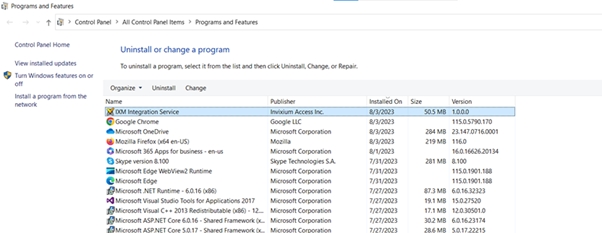
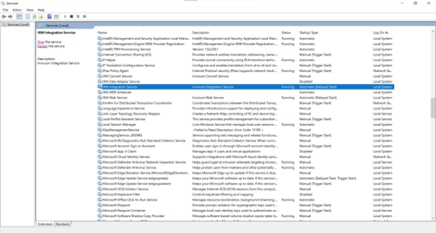
IXM WEB offers the capability to scan visitor documents using OCR technology and EIDA card readers. To integrate OCR and EIDA Readers with IXM WEB, it is a prerequisite to install the “IXM Integration Service” in the IXM Visitor Workstation.
Click on the ![]() (Download Setup) icon to install the “IXM Integration Service”.The “IXMIntegrationServiceSetup.exe” file will be downloaded.
(Download Setup) icon to install the “IXM Integration Service”.The “IXMIntegrationServiceSetup.exe” file will be downloaded.
![]() Read how to install the IXM Integration Service...
Read how to install the IXM Integration Service...
OCR
Status
Click on the checkbox to enable or disable the feature. A tick mark in the box indicates the feature is enabled. Enabling this feature will allow the user to leverage the Optical Character Recognition (OCR) technology by downloading the “IXM Integration Service”.
Face Image Import
Click on the checkbox to enable or disable the feature. A tick mark in the box indicates the feature is enabled. Enabling this feature will allow the user to import a face image and set it as a profile photo in the visitor creation screen.
Document Import
Click on the checkbox to enable or disable the feature. A tick mark in the box indicates the feature is enabled. Enabling this feature will allow the user to import a document image and attach it as a document in the visitor creation screen.
EIDA
Status
Click on the checkbox to enable or disable the feature. A tick mark in the box indicates the feature is enabled. Enabling this feature will allow the user to scan the documents using EIDA card reader.
Face Image Import
Click on the checkbox to enable or disable the feature. A tick mark in the box indicates the feature is enabled. Enabling this feature will allow the user to import a face image and set it as a profile photo in the visitor creation screen.
Consider Arabic data
Click on the checkbox to enable or disable the feature. A tick mark in the box indicates the feature is enabled.
If this feature is enabled, the EIDA reader will scan the Arabic text on the card.
If this feature is disabled, the EIDA reader will scan the English text on the card.
Port:
Enter the port number in which your IXM Integration service is listening. The default port number is 1401. You can change the port number before downloading the “IXM Integration Service” setup file.
Gender Mapping
When reading the card through OCR, the extracted gender might not correspond to “male” or “female”. Instead, it reflects the card’s content. Map the card content with “Male” or “Female” as follows:
Female:
Enter the content on the card that should be considered and labeled as “Female” in IXM WEB.
Male:
Enter the content on the card that should be considered and labeled as “Male” in IXM WEB.
Once you have entered all the details, click on the Save button to save the settings. Click on the Reset button to clear the selection.
Click on the ![]() icon at the top left corner of the screen to go back to the previous screen.
icon at the top left corner of the screen to go back to the previous screen.
