You are here: Visitor > VMS for the Security
|
|
VMS for the Security
|
NOTE To access the Visitor module, the security personnel must log in to the IXM WEB as an "Employee" using their credentials.
|
In the Visitor Management System, security personnel can manage the Watchlist, and screen the visitors, and grant approval for entry into the premises.
The screen contains three tabs - Inbox, Security Clearance, and Watchlist. By default, the "Inbox" tab is displayed.
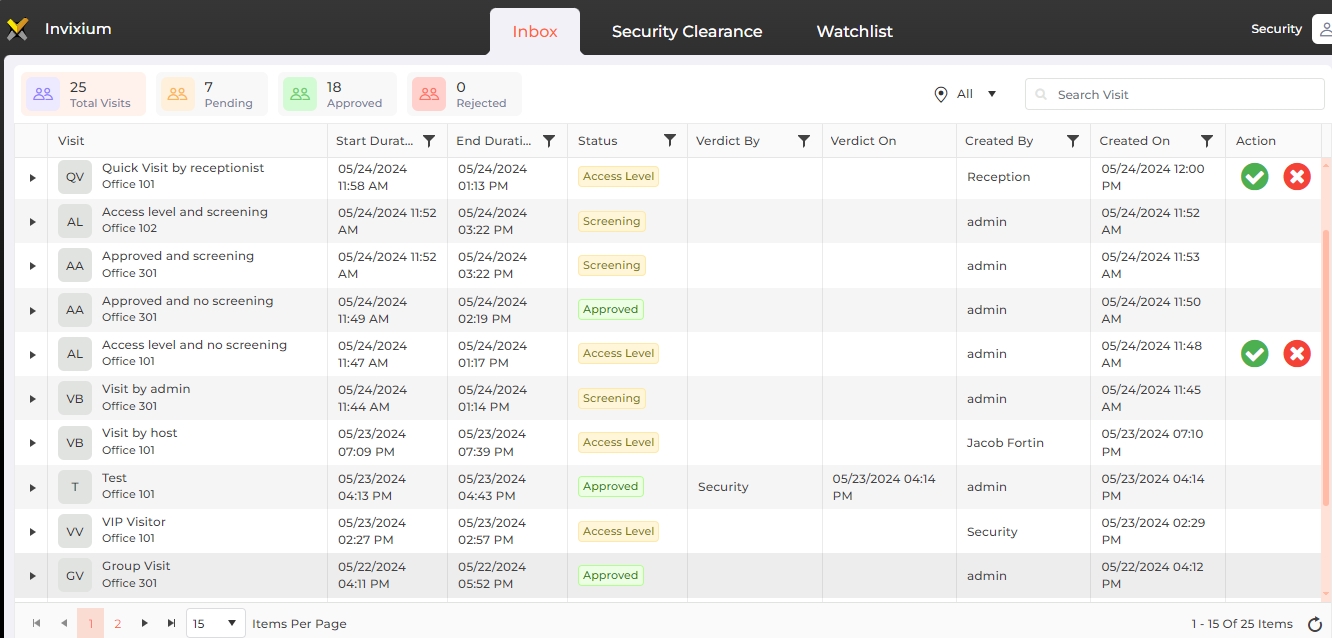
Screen Layout of Inbox
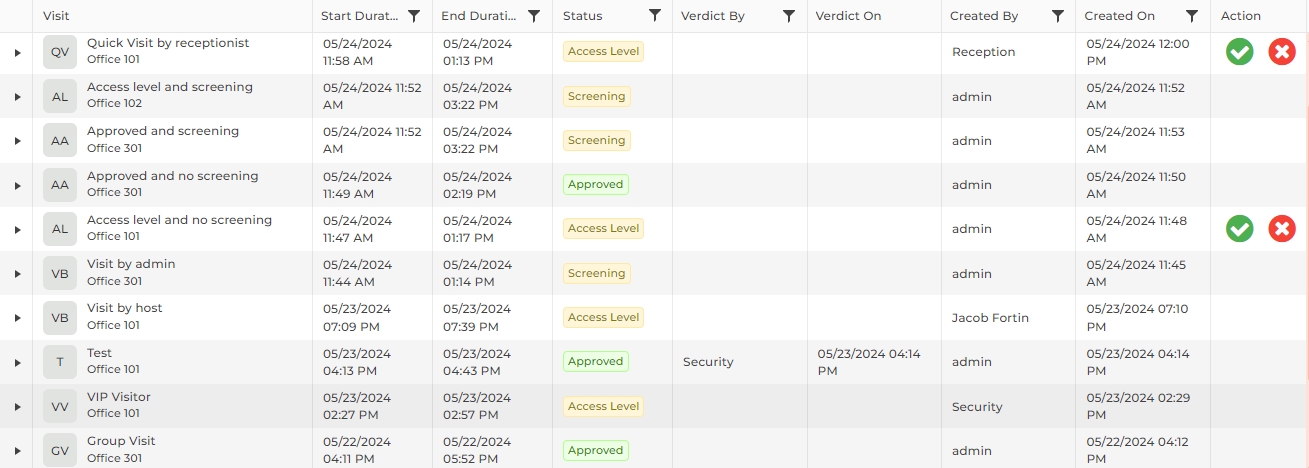
Field Description of Inbox
A list of all Visits generated by the administrator, receptionist, and host will be displayed as shown above. If no visits have been added yet, this list will be empty. The following visits will not be displayed:
-
visits cancelled / deleted by the administrator or host
-
visits that are yet to be approved by the host
The statistics on the top of the list provides information regarding total visits, pending visits, approved visits, and rejected visits. Click on the respective tile to refresh the list accordingly.
By default, the list will display all visits for all locations. You can filter the visits by their status and location. Select the status by clicking on the respective tile. The location can be changed from the dropdown list next to the "Search" box. The list will be refreshed with relevant visits.
|
NOTE The dropdown list will display only the locations for which the security has permissions, as specified in the User Menu >> System Users >> User Rights section.
|
Search:
You can search for a particular Visit by entering its full or partial name. Once entered, press the <ENTER> key. The list will be refreshed with Visits matching the entered name.
Expand the visit by clicking on the ► icon at the beginning of the row to view visitor details.
Visitors or companies listed in the Watchlist will be marked with a special  icon next to their names, to help determine whether access should be granted or denied.
Furthermore, clicking on the ![]() icon under the "Action" column of the visitor list will display the Watchlist details of the visitor.
icon under the "Action" column of the visitor list will display the Watchlist details of the visitor.
The security personnel need to take action as per the status of each visit explained below:
![]() Visits with "Access Level" status
Visits with "Access Level" status
![]() Visits with "Screening" status
Visits with "Screening" status
Click on the  button to reject the visitor. Rejected visitors will not be available for further process.
Screen Layout of Security Clearance
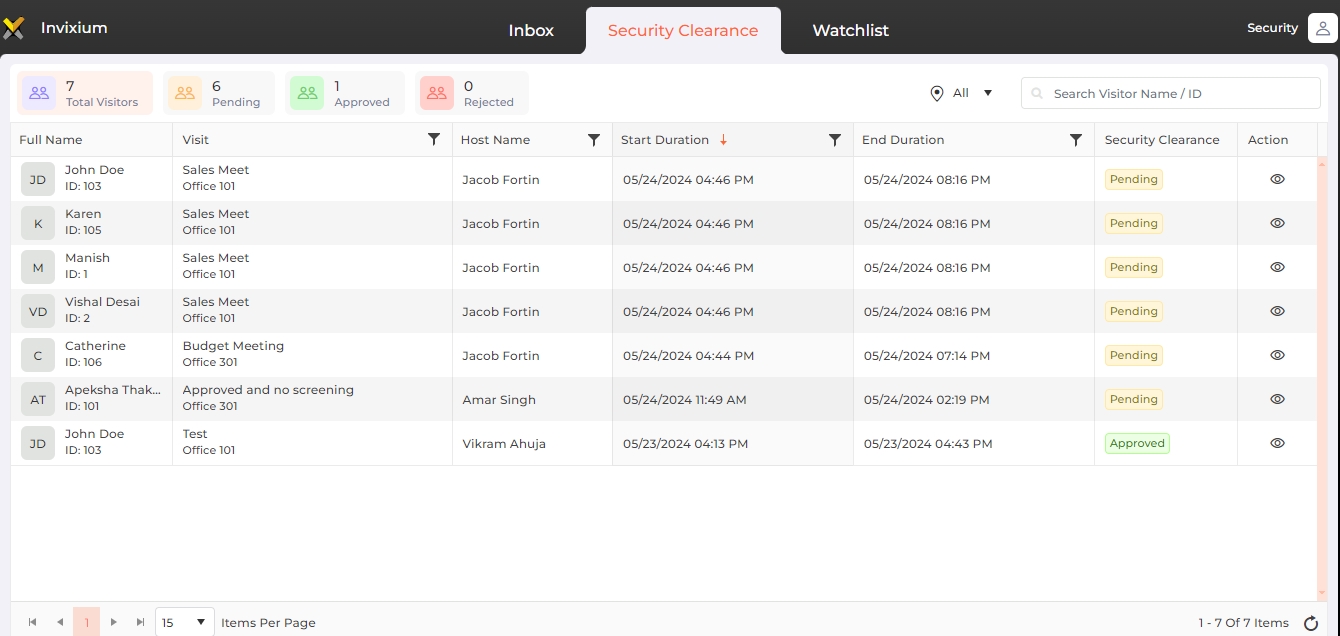
Field Description of Security Clearance
If the "Security Clearance" feature is disabled from the Visitor >> Configuration >> Settings section, security clearance is not required for any of the visitors. The visits approved from the "Inbox" tab will be available to the administrator and receptionist to record the Check-in and Check-out times of the visitors.
If the "Security Clearance" feature is enabled from the Visitor >> Configuration >> Settings section, visitors approved from the "Inbox" tab will be required to undergo the security clearance.
A list of visitors approved from the "Inbox" will be displayed as follows:

|
NOTE For Group Visits, only the primary visitor will be displayed for security clearance.
|
The statistics at the top of the list provides information regarding total visitors, pending visitors, approved visitors, and rejected visitors. Click on the respective tile to refresh the list accordingly.
By default, the list will display approved visits for all locations. You can filter the visits by their status and location. Select the status by clicking on the respective tile. The location can be changed from the dropdown list next to the "Search" box. The list will be refreshed with relevant visits.
|
NOTE The dropdown list will display only the locations for which the security has permissions, as specified in the User Menu >> System Users >> User Rights section.
|
Search:
You can search for a particular Visitor by entering their full or partial name. Once entered, press the <ENTER> key. The list will be refreshed with visitors matching the entered name.
Click on the ![]() icon under the "Action" column of the list. The visitor information will be displayed as under:
icon under the "Action" column of the list. The visitor information will be displayed as under:
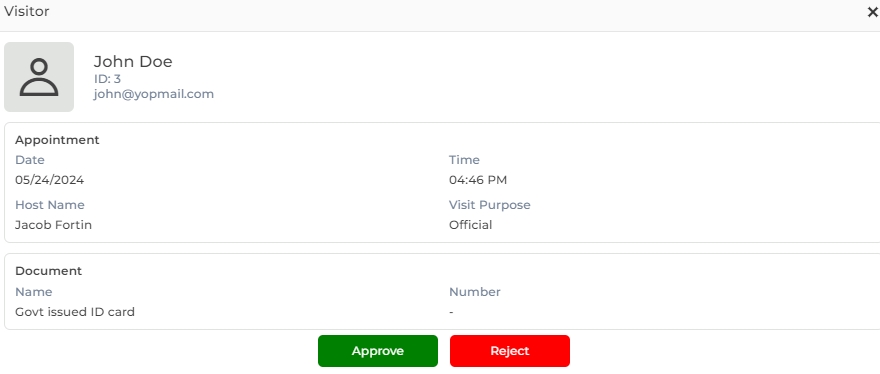
Click on the Approve button to approve the visitor's security clearance. The status of visitor will change from "Pending" to "Approved". Upon successful security clearance of all visitors, they will be available to the administrator and receptionist to record their Check-in and Check-out times.
|
NOTE Only those visitors can be approved or rejected whose visits have not yet expired or in other words, their "End Duration" is equal to or later than the current date.
|
Click on the Reject button to reject the visitor's security clearance. The application will ask for confirmation as follows:
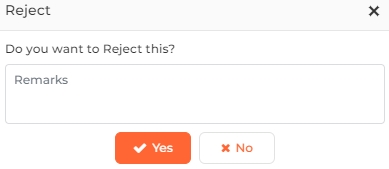
Click on the Yes button to reject the visitor. The status of the visitor will be updated to "Rejected". Click on the No button to discard the action.
Screen Layout of Watchlist
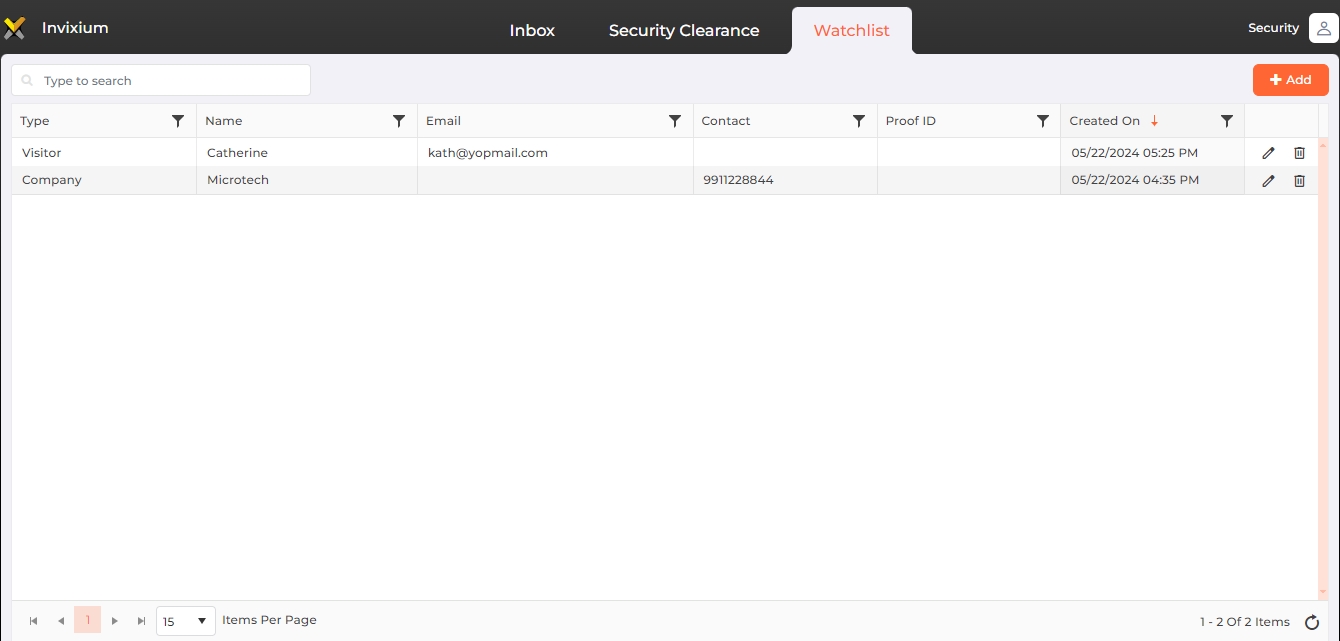
A Watchlist is a list of individuals and companies that require close surveillance for specific reasons. It is used by security to identify and flag these entities before they enter the premises. During the visitor screening, the application checks if the visitor is listed in the Watchlist and issues alerts to determine whether access should be granted or denied. If no companies / individuals have been added yet, this list will be empty.
Field Description of Watchlist
Search:
You can search for a particular Visitor / Company by entering its full or partial name. Once entered, press the <ENTER> key. The list will be refreshed with data matching the entered name.
Click on the  button in the top right corner of the screen to add a new Visitor. To edit a Visitor, click on the
 ![]() icon in the last column of its row. The following screen will be displayed:
icon in the last column of its row. The following screen will be displayed:

Select Type:
While adding a new Visitor, Select "Visitor" from the dropdown list.
While editing a Visitor, this field will remain disabled. The Type cannot be changed.
First Name:
Enter the first name of the visitor.
Last Name:
Enter the last name of the visitor.
Contact:
Enter the contact number of the visitor.
Email:
Enter the email address of the visitor.
Proof ID:
Enter the proof ID of the visitor.
Company Name:
Enter the company name of the visitor.
Once you have entered all the details, click on the Save button to save the Visitor in the Watchlist. Click on the Cancel button to discard the action.
Click on the  button at the top right corner of the list to add a new Company. To edit a Company, click on the
 ![]() icon in the last column of its row. The following screen will be displayed:
icon in the last column of its row. The following screen will be displayed:

Select Type:
While adding a new Company, Select "Company" from the dropdown list.
While editing a Company, this field will remain disabled. The Type cannot be changed.
Name:
Enter the name of the Company.
Short Name:
Enter the short name of the Company.
Domain Name:
Enter the domain name of the Company.
Contact:
Enter the contact number of the Company.
Location:
Enter the location of the Company.
Address:
Enter the address of the Company.
Once you have entered all the details, click on the Save button to save the Company in the Watchlist. Click on the Cancel button to discard the action.
To delete a Company / Visitor, click on the ![]() icon in the last column of its row. The deleted Company / Visitor will be removed from the list.
icon in the last column of its row. The deleted Company / Visitor will be removed from the list.


 button under the "Action" column of the list to approve the visit. The status of the visit will be updated to "Approved" and will be available for further processing. The "Verdict By" column of the list will be updated with "Security" and the "Verdict On" column with be updated with the time stamp of visit approval.

