VMS for the Receptionist
NOTE To access the Visitor module, the receptionist must log in to the IXM WEB as an "Employee" using their credentials. |
In the Visitor Management System, a receptionist can manage Quick Visits created by them, manage Watchlist, and record check-ins and check-outs of the visitors.
The screen contains two tabs - Visitors and Watchlist. By default, the "Visitors" tab is displayed.
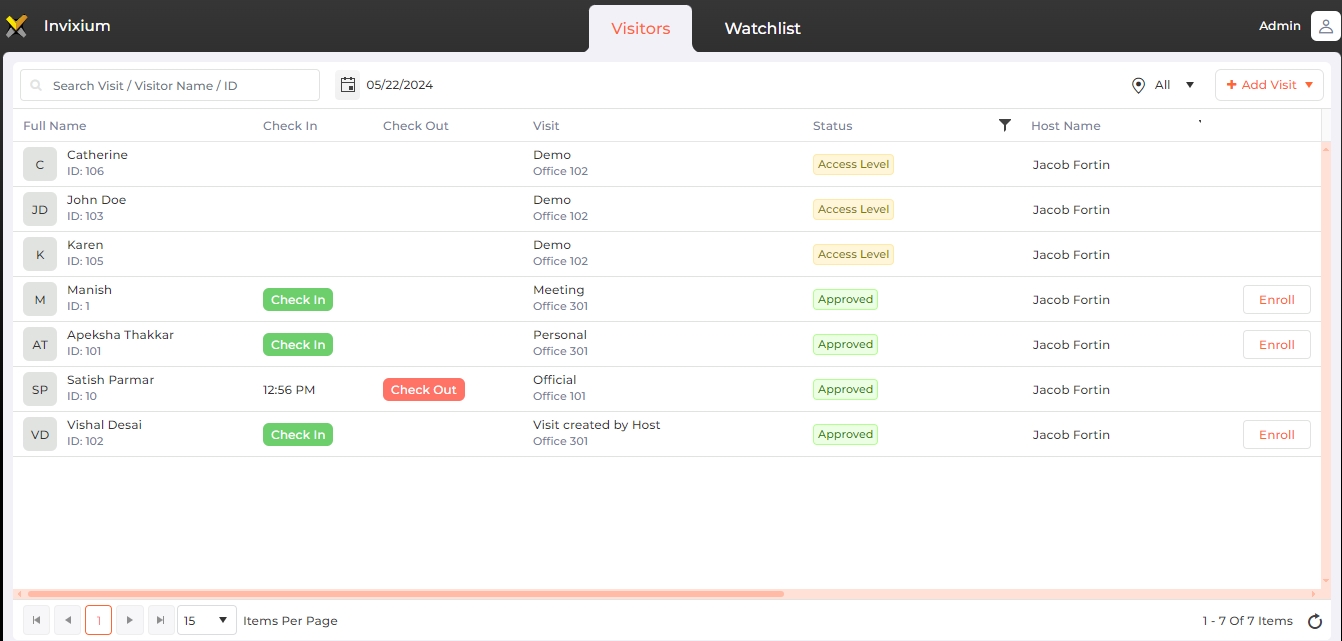
Screen Layout of Visitors
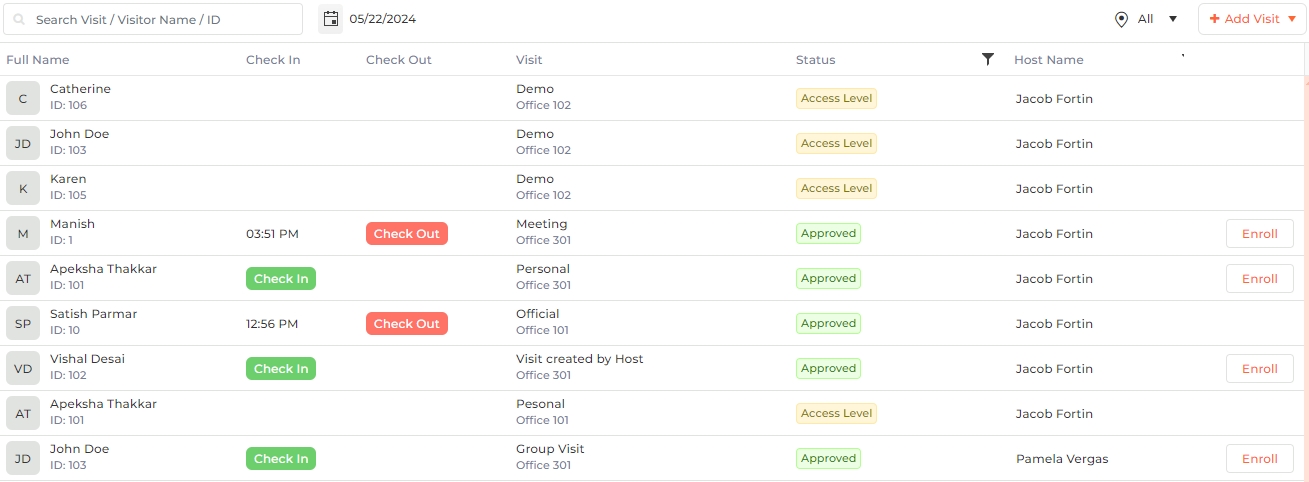
Field Description of Visitors
A list of visitors belonging to already defined Visits will be displayed. For Group Visits, only the primary visitor will be displayed. If no visits have been added yet, this list will be empty.
Below is the list of visit statuses and their meanings:
| Status | Meaning |
| Screening | Visit / Visitor screening is undergoing at security level |
| Access Level | Visit to location that requires access approval or has restricted entry |
| Approved |
|
| Visit Cancelled | Visit cancelled by the administrator / host |
| Host Approval | Visit pending to be approved by the host |
Search:
You can search for a particular Visit by entering its full or partial name, or visitor's partial or full name or ID. Once entered, press the <ENTER> key. The list will be refreshed with Visits matching the entered name.
By default, the list will display visits for all locations that have not yet expired or in other words their "End Duration" is equal to or later than the current date. You can filter the visits by date and location. Change the date by clicking on the calendar icon next to the Search box. The location can be changed from the dropdown list next to the "Add Visit" button. The list will be refreshed with relevant visits.
NOTE The dropdown list will display only the locations for which the receptionist has permission, as specified in the User Menu >> System Users >> User Rights section. |
A receptionist can add both Quick Visits and Advanced Visits. Quick Visits are created for visitors who walk in without an appointment and are intended for same-day visits. In contrast, Advanced Visits are scheduled in advance and can be set for the same day or over multiple days.
To add a Quick Visit, hover the mouse over the Add Visit button in the right-hand corner of the screen and select the Quick option from the dropdown list.
To edit a Quick Visit, click on the ![]() icon in the end of its row. Note that a Visit can be edited until it has not been approved or has not passed its End Duration. The edit icon will not appear for the approved or expired visits.
icon in the end of its row. Note that a Visit can be edited until it has not been approved or has not passed its End Duration. The edit icon will not appear for the approved or expired visits.
Screen Layout of Quick Visit
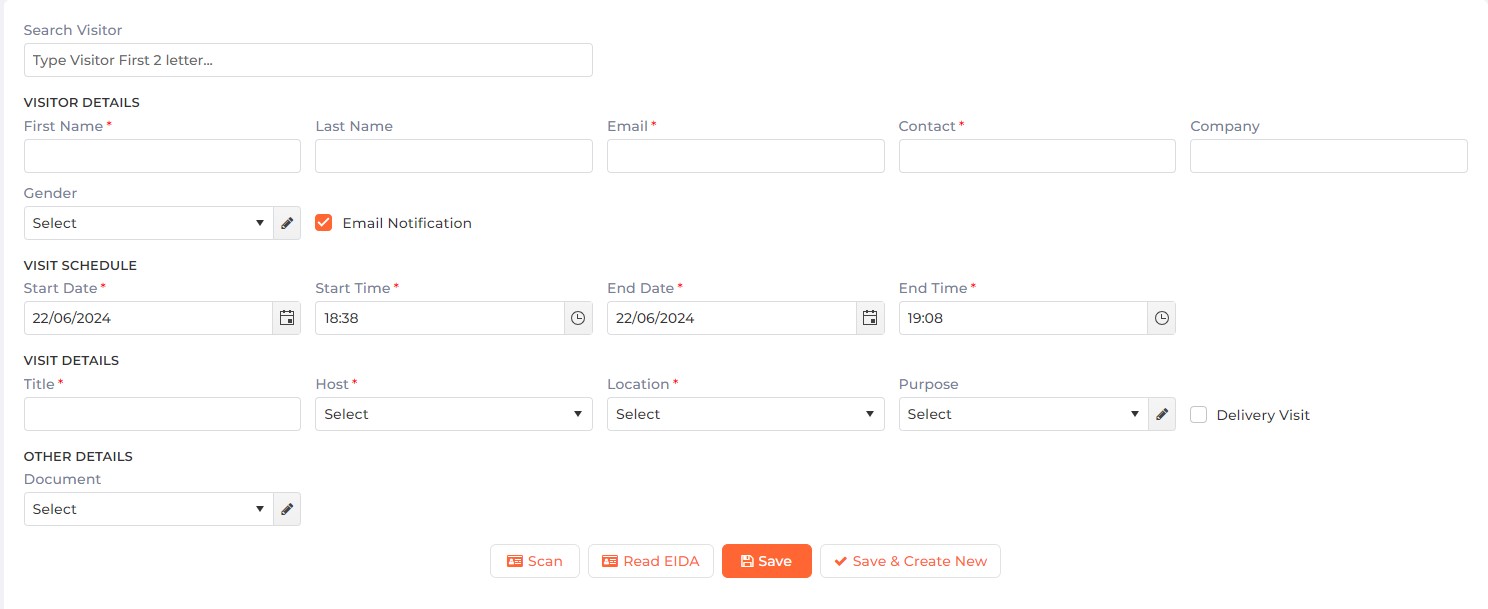
Field Description of Quick Visit
Search Visitor:
You can search for an existing visitor by entering the first two letters of their first name or last name. A list of matching names will be displayed. Select the desired visitor from the dropdown list.
VISITOR DETAILS
This section displays details of the selected Visitor. You can also use it to add a new Visitor.
First Name:
Enter the first name of the new Visitor.
Existing visitor's first name can not be changed.
Last Name:
Enter the last name of the new Visitor.
Existing visitor's last name cannot be changed.
Designation:
Enter the designation of the new Visitor.
Existing visitor's designation cannot be changed.
Company:
Enter the company name of the new Visitor.
Existing visitor's company name cannot be changed.
Gender:
Select the gender of the new Visitor from the dropdown list.
Existing visitor's gender cannot be changed.
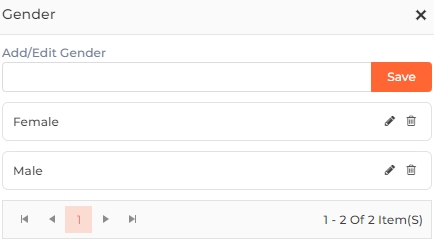
Click on the
button to manage Gender on the fly as follows:
Add/Edit Gender:
To add a new Gender, enter the name of the Gender in the given box. Click on the Save button to save the Gender.
To edit a Gender, click on the
icon in its respective row. The name will then appear in the given box, allowing you to edit it. Click on the Save button to save the Gender.
To delete a Gender, click on the
icon in its respective row. The application will ask for confirmation.
Click on the Delete button to delete the Gender or the Cancel button to discard the action.
Email Notification
 | This option will be displayed only when adding a Quick Visit, not when editing it. |
Click on the checkbox to enable or disable the feature. A tick mark in the checkbox indicates the feature is enabled.
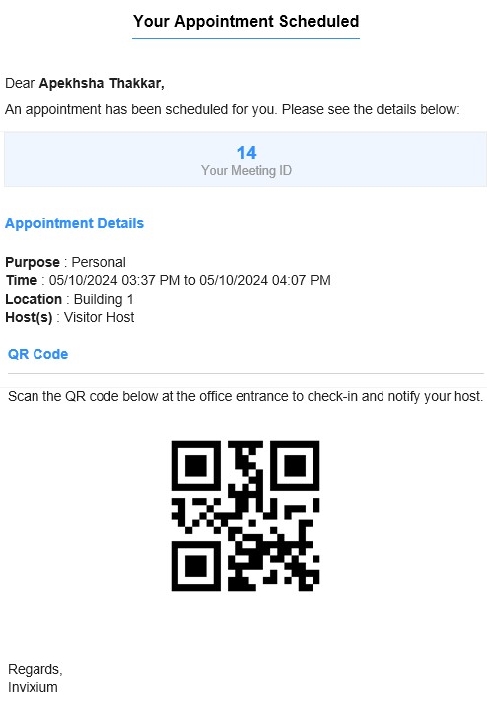
If this feature is enabled, an email notification will be sent to the Visitor with details about the Visit. ![]() View sample Email
View sample Email
If this feature is disabled, an email notification will not be sent to the Visitor.
VISIT SCHEDULE
Start Duration:
Enter or select the starting date and time for the Visit.
End Duration:
A Quick Visit can be scheduled for the same day.
Enter or select the ending time for the Visit. By default, the visit duration is set to half an hour.
VISIT DETAILS
Title:
Enter the title for the Visit.
Host:
Denotes the Host of the Visit.
A list of Employees who have been specified as Hosts from the Employees >> Add/Edit Employee >> Account Details section is displayed. Select the host of the Visit from the dropdown list.
Location:
Denotes the Location for the Visit.
From the dropdown list, select the location for the Visit as specified in the Visitor >> Configuration section.
Purpose:
Select the purpose of the Visit from the dropdown list.
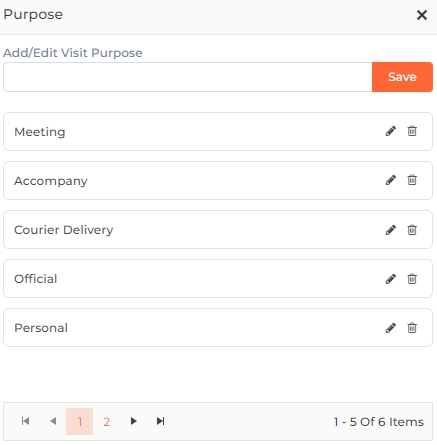
Click on the
button to manage Visit Purposes on the fly as follows:
Add/Edit Visit Purpose:
To add a new Visit Purpose, enter the name of the Purpose in the given box. Click on the Save button to save the Purpose.
To edit a Visit Purpose, click on the
icon in its respective row. The name will then appear in the given box, allowing you to edit it. Click on the Save button to save the Purpose.
To delete a Visit Purpose, click on the
icon in its respective row. The application will ask for confirmation.
Click on the Delete button to delete the Purpose or the Cancel button to discard the action.
Delivery Visit
Click on the checkbox to enable or disable the feature. Enable this feature if it's a courier delivery.
OTHER DETAILS
Document:
Select the Document type of the Visitor from the dropdown list.
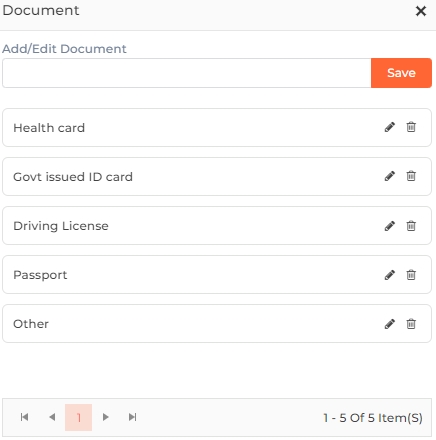
Click on the
button to manage Documents on the fly as follows:
Add/Edit Document:
To add a new Document, enter the name of the Document in the given box. Click on the Save button to save the Document.
To edit a Document, click on the
icon in its respective row. The name will then appear in the given box, allowing you to edit it. Click on the Save button to save the Document.
To delete a Document, click on the
icon in its respective row. The application will ask for confirmation.
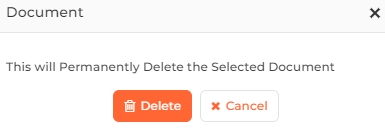
Click on the Delete button to delete the Document or the Cancel button to discard the action.
Document Number:
This option will be displayed if a Document type is selected.
Enter the Document Number.
Document Issued On:
This option will be displayed if a Document type is selected.
Enter or select the date on which the Document was issued.
Document Expires On:
This option will be displayed if a Document type is selected.
Enter or select the date on which the Document will expire.
Document File:
This option will be displayed if a Document type is selected.
Click on the Upload button to upload the Document file manually from its location.
You can upload only JPG, JPEG, and PDF files.
Upon successful upload, the file name will be displayed. You can remove the attached file by clicking on the x icon.
Alternatively, you can scan the document by using OCR / EIDA Reader. Please note that this feature is available only if the "IXM Integration Service" has been installed.
To scan the document using the OCR reader, click on the Scan button.
To scan the document using the EIDA reader, click on the Read EIDA button.
Once the document is scanned, all the information will be displayed automatically in the respective boxes.
Once you have entered all the details, click on the Save button to save the Quick Visit. The new visit will be displayed in the list. Click on the Save & Continue button to save the Quick Visit and continue entering details for another Quick Visit.
NOTE If the feature "Host Approval For Walk-in Visitor" is enabled from the Visitor >> Configuration >> Settings section, the status of the new Visit will be displayed as "Host Approval". The host must approve the visit before the security or reception can access it for further action. |
To add an Advance Visit, hover the mouse over the Add Visit button in the right-hand corner of the screen and select the Advance option from the dropdown list.
NOTE Unlike Quick Visit, a receptionist cannot edit or delete an Advance Visit. |
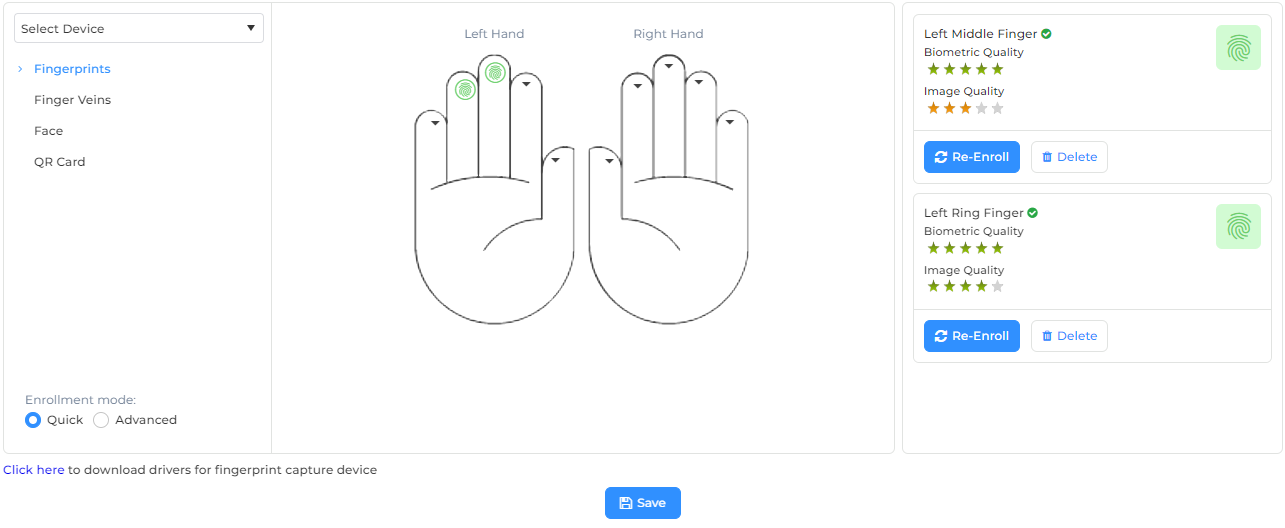
The receptionist can enroll the credentials of the visitor at the time of Check-in. To do so, click on the Enroll button in the visitor row. The following screen will be displayed:
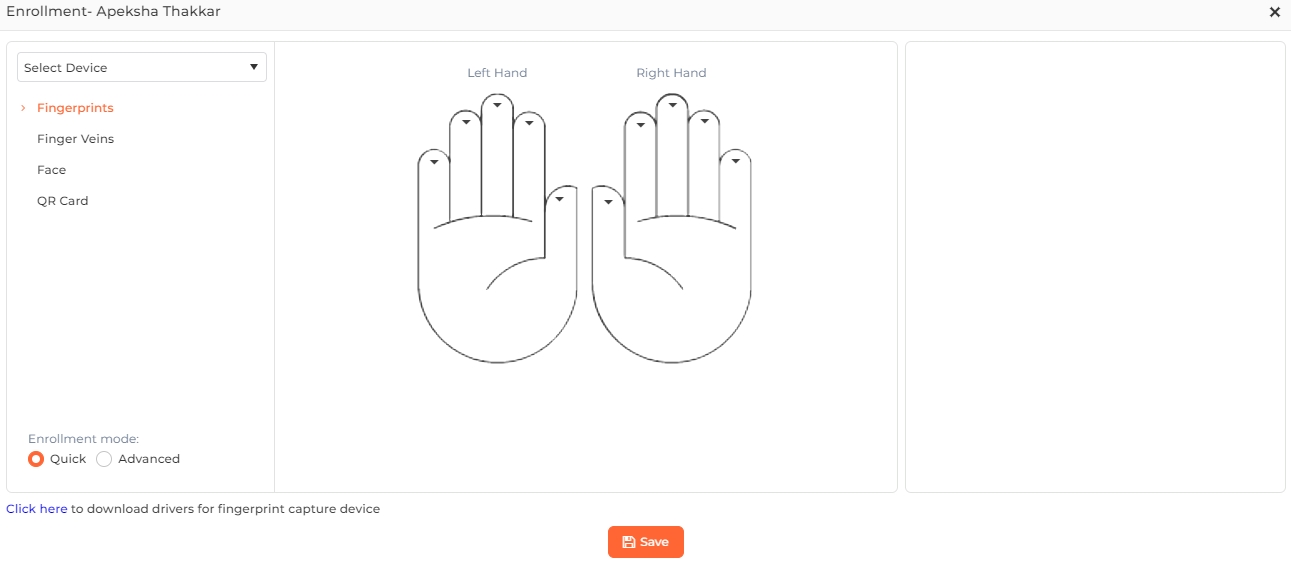
Select Device:
Select the Device on which enrollment has to be done from the dropdown list.
NOTE Enrollment cannot continue unless a Device is selected. |
Next, click on the type of enrollment that has to be done: Fingerprints, Finger Veins, Face, or QR Cards.
Enrollment Mode:
Select one of the following options to enroll the selected Visitor:
Quick
Click on this option for a quick enrollment. This is the default selected option.
Advanced
Click on this option to enable advance enrollment.
STEP 1:
Hover the cursor over the two hands and click on the finger that you want to enroll for the Visitor. A “Place Finger” message will be displayed. Ask the Visitor to place their finger on the device.
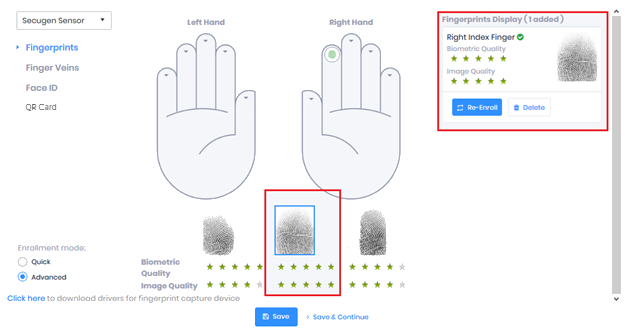
In case of Advanced enrollment, the application will ask the Visitor to place the selected finger 3 times. Each time the IXM WEB will notify the Visitor by displaying the “Place Finger” message.
STEP 2:
In case of Quick enrollment, once the finger is scanned, the device will show a “Remove Finger” message and the fingerprint image will be displayed on the right side of the window along with the image quality.
In case of Advanced enrollment, once all 3 attempts are captured, IXM WEB will display the captured fingerprint image of each attempt and select the capture with the best quality for each finger.
STEP 3:
After enrollment of all the required fingers, click on the Save button to save details in the IXM WEB database.
Follow the steps mentioned below:
STEP 1:
Hover the cursor over the two hands and click on the finger which you want to enroll for the Visitor. A “Place Finger” message will be displayed. Ask the Visitor to place their finger on the device.
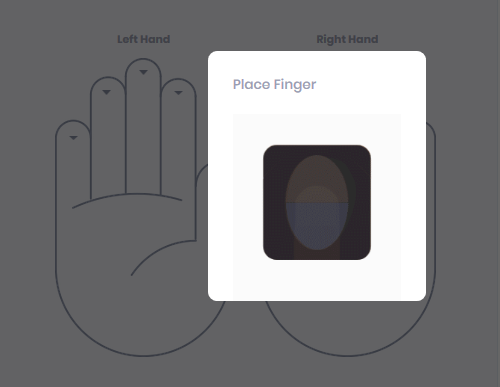
STEP 2:
Once the finger is scanned, the device will show a “Remove Finger” message and the fingerprint image will be displayed on the right side of the window along with the image quality.
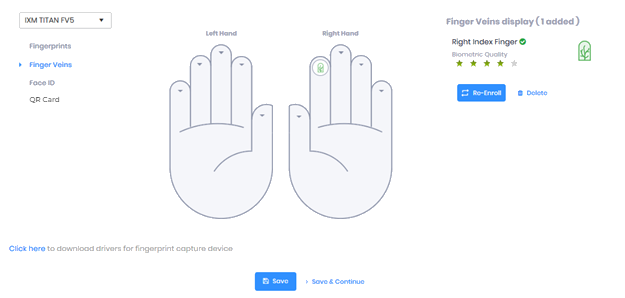
NOTE Invixium recommends using the index and middle fingers for enrollment, and that each employee is enrolled with a quality of at least 4 stars for all biometrics. To achieve this, it is very important to place the finger so that it is completely straight and the tip of the finger rests on the guide at the back of the finger vein cavity. |
STEP 3:
After enrollment of all the required fingers, click on the Save button to save details in the IXM WEB database.
To enroll face from a device, follow the steps mentioned below:
STEP 1:
Click on Enroll face to start face enrollment.
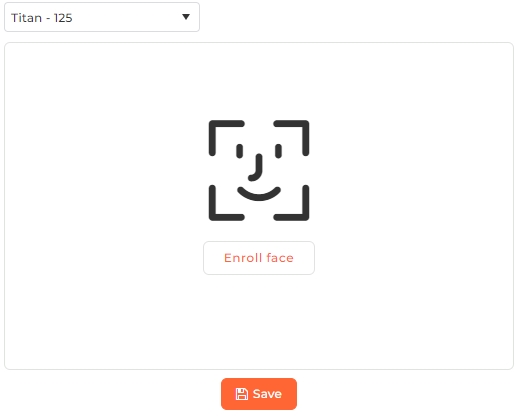
STEP 2:
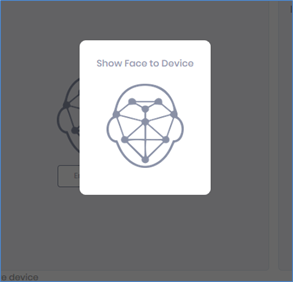
The application will show a "Show Face to Device" message. The Visitor should look straight at the camera when enrolling in their face. Avoid looking in other directions or turning your head during enrollment. Make sure the entire face is within the frame corners, which will turn green upon correct positioning.
STEP 3:
Once the device captures a face, the Visitor's face will be displayed on the right side of the application along with the Biometric Quality and Face Type (Live or Spoof).
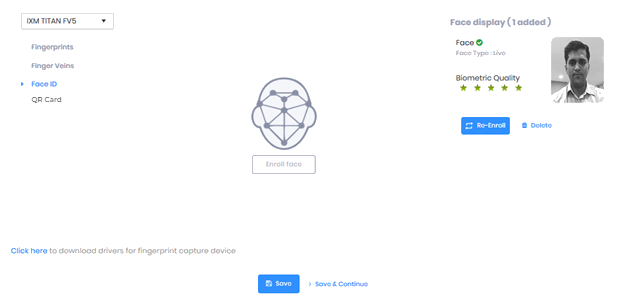
NOTE Invixium recommends saving Employees with face type as “Live” for optimal performance with the liveness detection setting turned ON.
|
STEP 4:
After successful enrollment of the face, click on the Save button to save details in the IXM WEB database.
If Card is being entered for the first time, the application will display following screen:
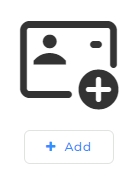 | Click on Add button to add a Card. |
In case Card(s) are already saved, the application will display a list of Cards on the right side of the screen as follows -
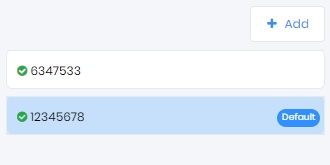 | Click on Add button to add a new Card.
Or click on the respective Card Number to edit or delete the Card. You can also make it the default Card or add a Digital Card with same number. |
Following screen will be displayed to enter Card details -
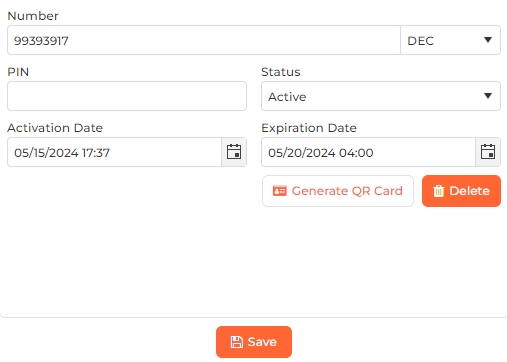
Number:
Enter the Card Number.
PIN:
Enter the PIN of the QR Card.
Status:
Select the Status of the Card from the dropdown list as follows -
Active
Inactive
Lost
Stolen
Only "Active" Cards will be granted access by the Device. Rest will not be granted access and an appropriate message will be displayed by the application.
Activation Date Time:
It denotes the date and time from when the Card will be active.
Click on the calendar icon to select the date and time icon to select the time. After this start date and time, the Card will become active for the Visitor. The Visitor using this Card will be granted access by the Device after this date and time. If it is set to blank, then the Device will not consider any Activation date and time for the Card.
Expiry Date Time:
It denotes the Expiry date and time of the Card.
Click on the calendar icon to select the date and time icon to select the time. The Card will be active for the Visitor till this date and time. Once this date and time passes, the Card will expire, and the Device will deny access to the Visitor. If it is set to blank, then the Device will not consider any Expiry date and time for that Card.
Click on Generate QR Card button if you have the number but do not have the QR for that number. The application will automatically generate a QR for the entered Number and display it as follows -
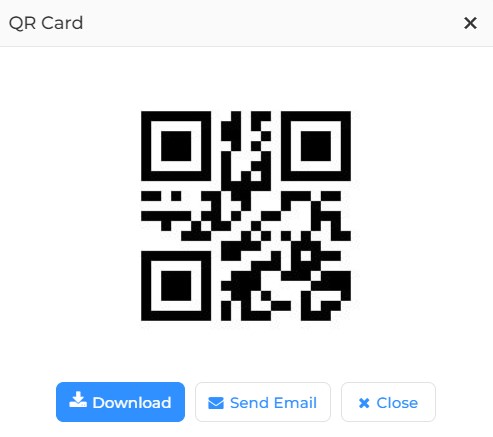
You can download or email the QR by clicking on the respective button.
Once you have entered all the details, click on the Save button to save details in the IXM WEB database. Upon doing so, IXM WEB will display a success or failure message.
If the visit's scheduled start date and time, along with any entry tolerance period, have passed, and the status of the visit is "Approved", a "Check-in" button will appear for the visitor as shown below:

Click on the Check-in button to record the check-in time of each visitor. The check-in time will be displayed instantly. If the administrator or receptionist has previously checked-in the visitor, the check-in time will be displayed.
NOTE For Group Visits, the "Check-in" button will appear only for the primary visitor. |
If the visitor has checked-in, a "Check-out" button will appear as shown below:

The "Check-out" button will remain visible till the visit's scheduled end date and time, along with any exit tolerance period.
Click on the Check-out button to record the check-out time of each visitor. The check-out time will be displayed instantly.
If the administrator or receptionist has previously checked-out the visitor, the check-out time will be displayed.
NOTE For Group Visits, the "Check-out" button will appear only for the primary visitor. |
Screen Layout of Watchlist

A Watchlist is a list of individuals and companies that require close surveillance for specific reasons. It is used by security to identify and flag these entities before they enter the premises. During the visitor screening, the application checks if the visitor is listed in the Watchlist and issues alerts to determine whether access should be granted or denied. If no companies / individuals have been added yet, this list will be empty.
Field Description of Watchlist
Search:
You can search for a particular Visitor / Company by entering its full or partial name. Once entered, press the <ENTER> key. The list will be refreshed with data matching the entered name.
Click on the  button in the top right corner of the screen to add a new Visitor. To edit a Visitor, click on the
 ![]() icon in the last column of its row. The following screen will be displayed:
icon in the last column of its row. The following screen will be displayed:

Select Type:
While adding a new Visitor, Select "Visitor" from the dropdown list.
While editing a Visitor, this field will remain disabled. The Type cannot be changed.
First Name:
Enter the first name of the visitor.
Last Name:
Enter the last name of the visitor.
Contact:
Enter the contact number of the visitor.
Email:
Enter the email address of the visitor.
Proof ID:
Enter the proof ID of the visitor.
Company Name:
Enter the company name of the visitor.
Once you have entered all the details, click on the Save button to save the Visitor in the Watchlist. Click on the Cancel button to discard the action.
Click on the  button at the top right corner of the list to add a new Company. To edit a Company, click on the
 ![]() icon in the last column of its row. The following screen will be displayed:
icon in the last column of its row. The following screen will be displayed:

Select Type:
While adding a new Company, Select "Company" from the dropdown list.
While editing a Company, this field will remain disabled. The Type cannot be changed.
Name:
Enter the name of the Company.
Short Name:
Enter the short name of the Company.
Domain Name:
Enter the domain name of the Company.
Contact:
Enter the contact number of the Company.
Location:
Enter the location of the Company.
Address:
Enter the address of the Company.
Once you have entered all the details, click on the Save button to save the Company in the Watchlist. Click on the Cancel button to discard the action.
To delete a Company / Visitor, click on the ![]() icon in the last column of its row. The deleted Company / Visitor will be removed from the list.
icon in the last column of its row. The deleted Company / Visitor will be removed from the list.
